在本指南中,你将学到:
- 什么是
llm-scraper - 如何按照分步演示使用它
- 如何用它进行代码生成
- 基于 LLM 的抓取的主要替代方案
- 它的关键限制以及如何克服这些限制
让我们开始吧!
什么是 llm-scraper?
llm-scraper 是一个 TypeScript 库,使用 LLM 来从任意网页提取结构化数据。
与每个网站都编写定制解析逻辑不同,你只需要定义一个数据结构(schema),该库就可以通过 LLM 分析页面内容并智能地填充数据。
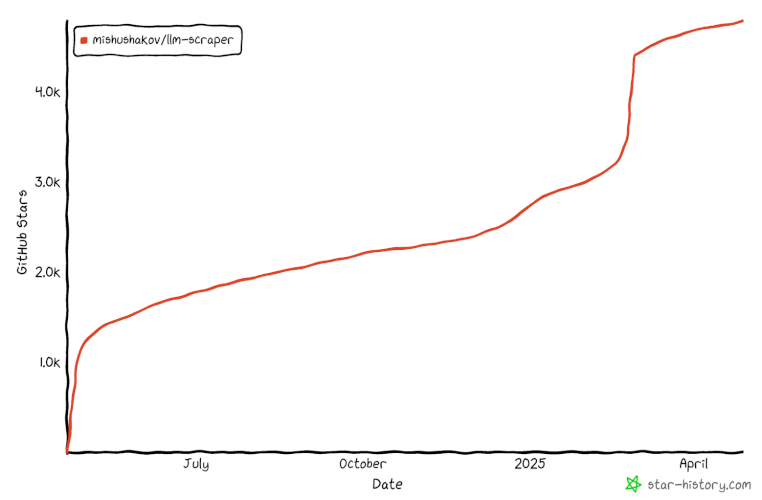
该库最初于 2024 年年中发布,目前还相对较新。然而,它已经在 GitHub 上收获了 4,000 多个星标,显示它正在迅速走红:
对于动态或结构不固定的网站(例如电商平台)来说,它非常理想,因为传统爬虫在这些场景下经常会失效。而在此类情形中,LLM 抓取大放异彩。
具体来说,llm-scraper 主要支持以下功能:
- 对多家 LLM 提供商的集成:可以与本地模型(如 Ollama 或 GGUF)以及云提供商(如 OpenAI 和 Vercel AI SDK)配合使用。
- 基于 Schema 的数据提取:使用 Zod Schema 定义所需数据结构,获得强类型和校验支持。
- 完整的类型安全:专为 TypeScript 设计,可在编译时进行完整的类型检查。
- 基于 Playwright:底层使用 Playwright 来控制浏览器和获取页面内容。
- 支持数据流式传输:在抓取过程中可流式返回对象,而不必等到全部完成才输出。
- 代码生成:可以根据你的 Schema 和目标动态生成抓取代码。
- 多种页面内容格式化选项:可以自由选择如何将页面内容发送给 LLM。
如何使用 llm-scraper 进行网页抓取
在本教程章节中,你将学习如何使用 llm-scraper 库来构建一个 AI 驱动的爬虫。目标网站是 ToScrape 网站上的某个电商产品页面:
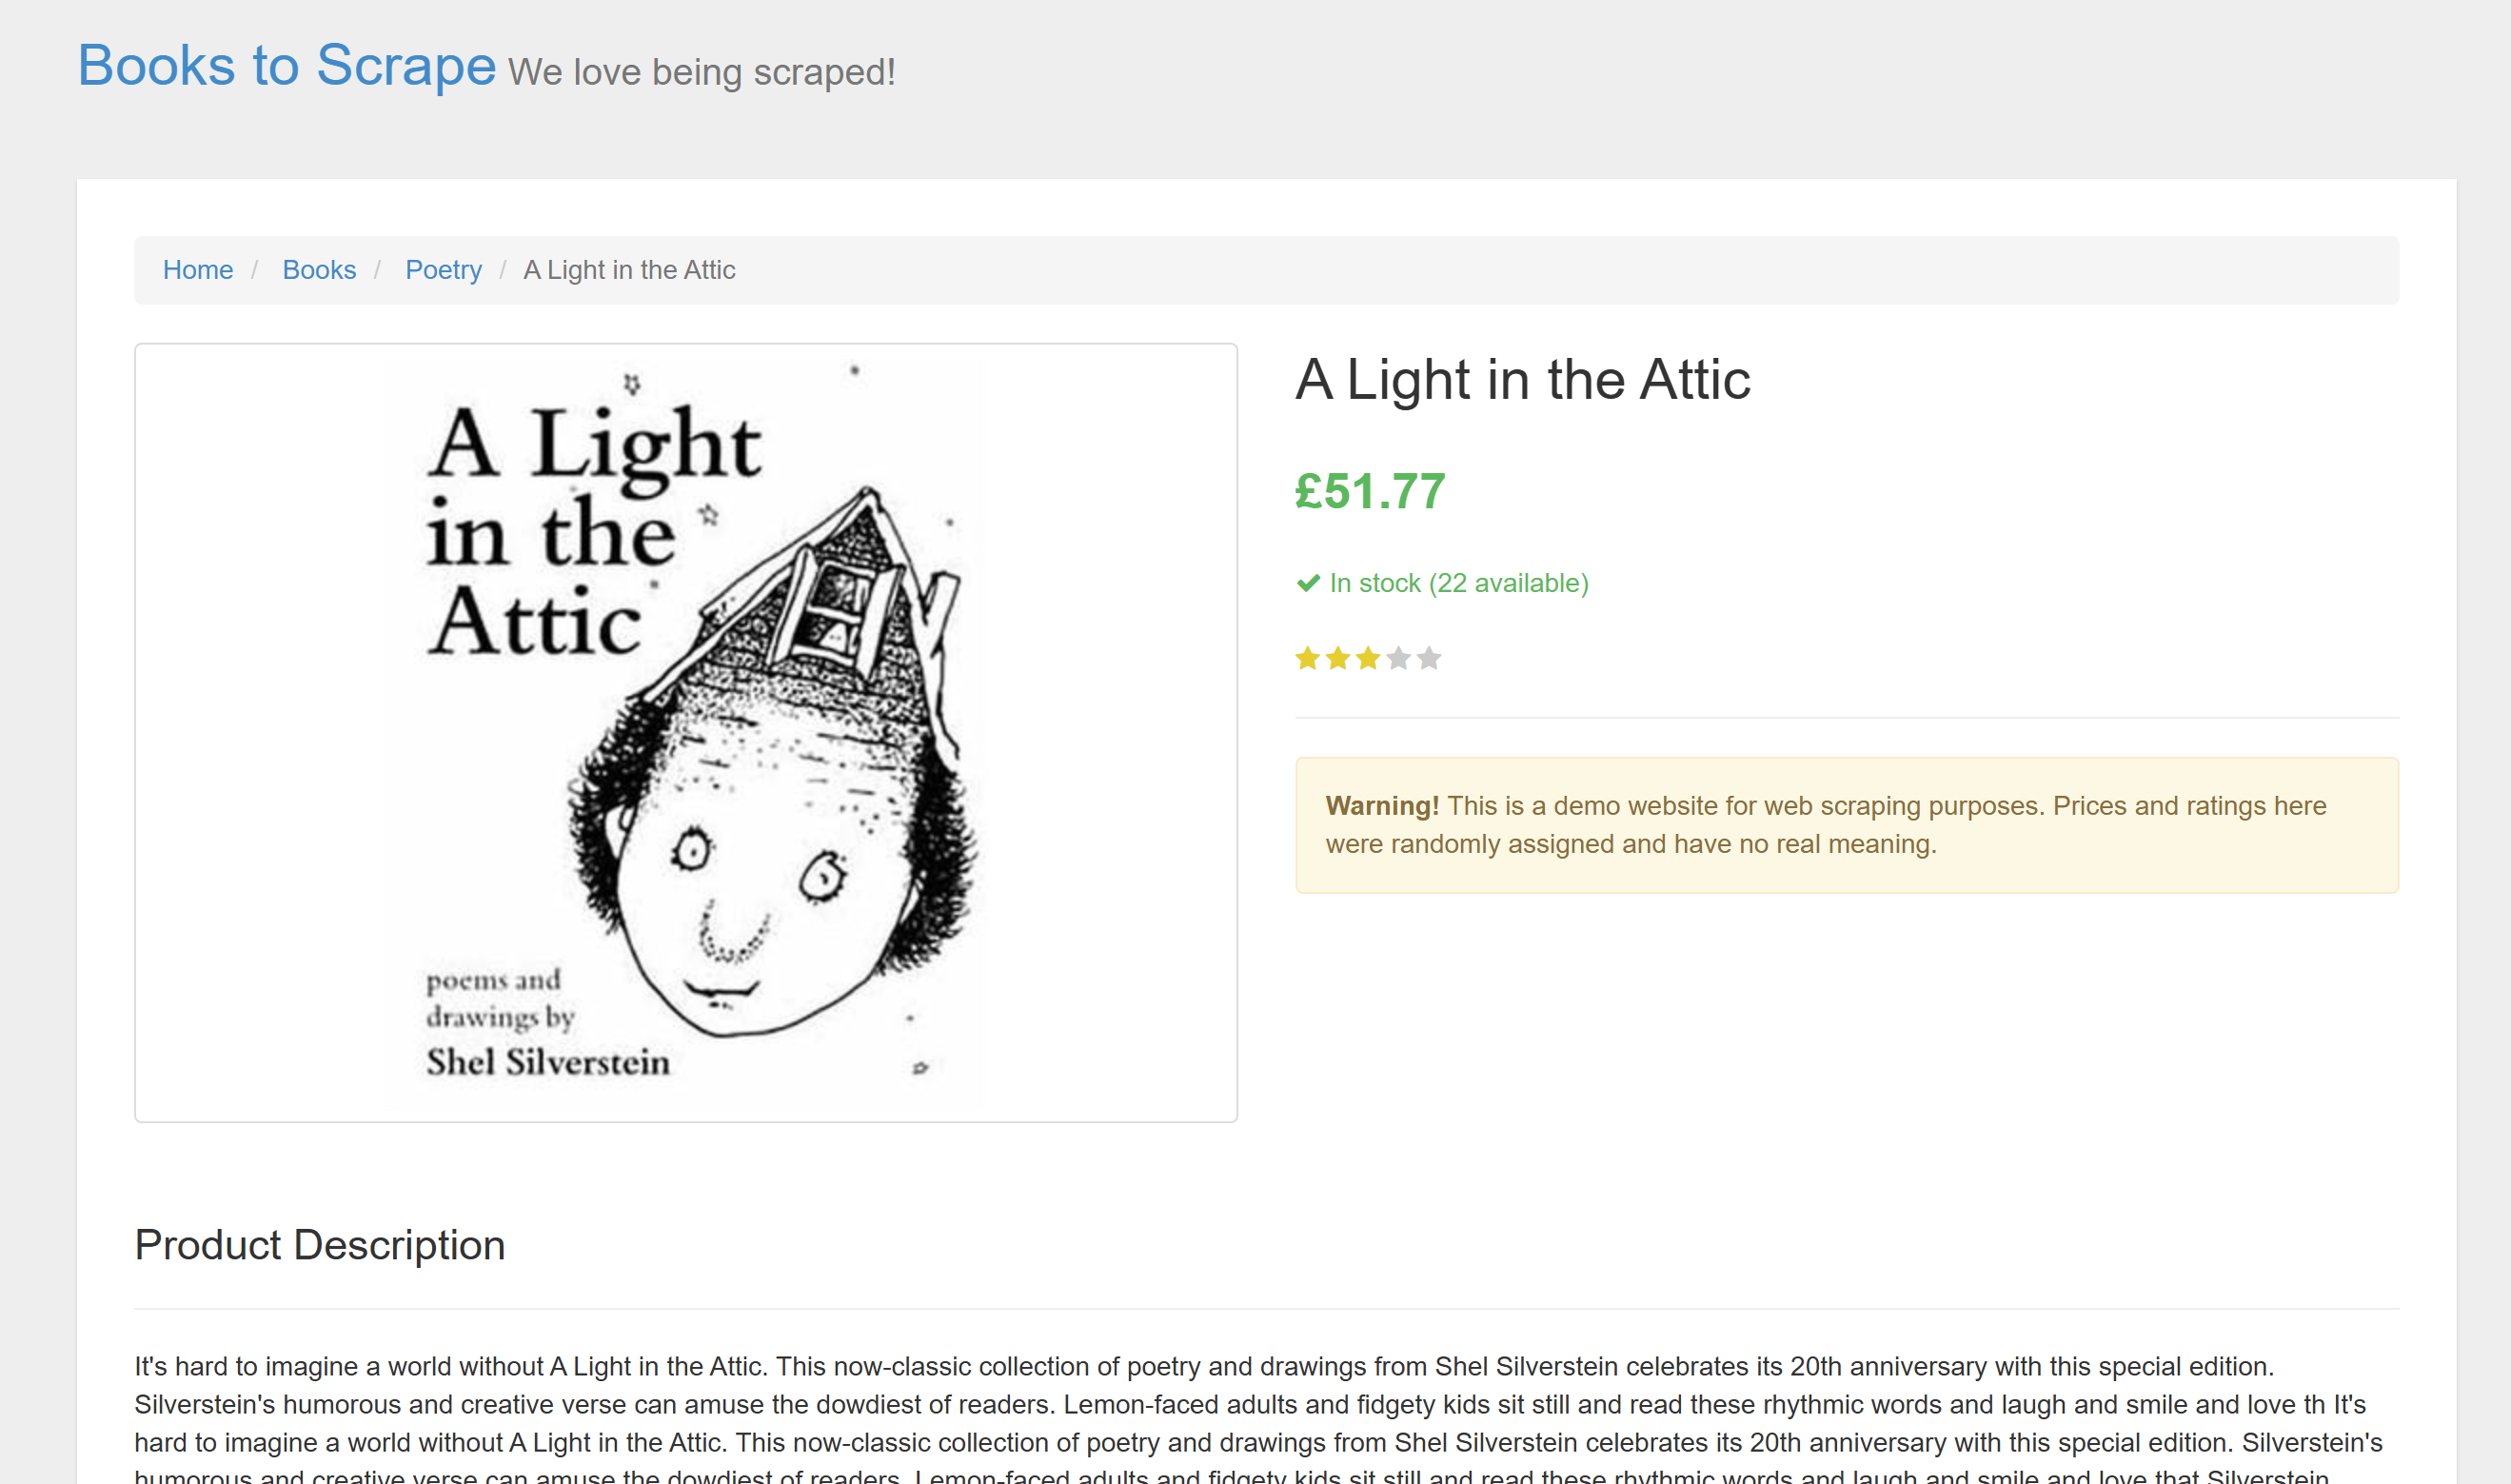
这是一个很好的示例,因为电商网站往往页面结构多变、不同产品的布局和信息可能大相径庭,对静态解析逻辑来说非常困难且不稳定。因此,AI 在此将大显身手。
按照以下步骤开始构建你的 LLM 驱动的爬虫吧!
先决条件
要跟随本教程,你需要:
- 在本地安装 Node.js
- 拥有一个 OpenAI API Key(或类似提供商如 Groq 的密钥)
- 对 TypeScript 和异步编程有基本认识
第 1 步:项目初始化
首先,确保你本地安装了 Node.js 的最新 LTS 版本。如果没有,请从Node.js 官方网站下载并安装。
然后,为爬虫创建一个项目并在终端进入该目录:
mkdir llm-scraper-project
cd llm-scraper-project
在这个项目目录下,运行以下命令初始化一个空的 Node.js 项目:
npm init -y打开上述命令生成的 package.json 文件,确保其中包含:
"type": "module"用你喜欢的 TypeScript IDE(例如 Visual Studio Code)打开该项目目录 llm-scraper-project。
接下来,安装 TypeScript 作为开发依赖:
npm install typescript --save-dev安装完 TypeScript 后,运行以下命令初始化 TypeScript 配置:
npx tsc --init项目中会出现一个 tsconfig.json 文件。打开并替换为:
{
  "compilerOptions": {
    "module": "ESNext",
    "target": "ESNext",
    "moduleResolution": "node",
    "esModuleInterop": true,
    "allowSyntheticDefaultImports": true,
    "strict": true,
    "skipLibCheck": true
  }
}
现在,在项目中新建一个 scraper.ts 文件:
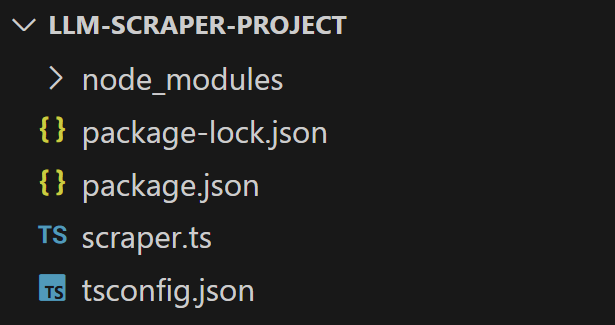
该文件很快就会包含你的 llm-scraper 的数据提取逻辑。由于脚本会用到异步 TypeScript 代码,先在文件内初始化一个异步函数:
async function llmScraping() {
  // your LLM scraping logic...
}

llmScraping()
很好!现在你已完成所有初始化,可以正式开始构建 AI 驱动的爬虫了。
第 2 步:安装所需库
要让 llm-scraper 工作,需要另外两个库:
- Zod:TypeScript 优先的 Schema 声明与验证库。
- Playwright:一个可以用统一的 API 来自动化 Chromium、Firefox、WebKit 浏览器的库。
用以下命令将它们与 llm-scraper 一起安装:
npm install zod playwright llm-scraperPlaywright 需要额外的依赖(浏览器的二进制文件等),使用以下命令安装:
npx playwright install现在,在 scraper.ts 文件中引入 Zod 和 Playwright:
import { z } from "zod"
import { chromium } from "playwright"
import LLMScraper from "llm-scraper"
很好!现在你拥有了在 TypeScript 中进行 LLM 网页抓取所需的全部库。
第 3 步:设置 OpenAI
llm-scraper 支持多家 LLM 提供商,包括 OpenAI、Groq、Ollama、GGUF 等。本教程以 OpenAI 为例。如果你还没有,请务必先获取 OpenAI API Key。
首先,安装 OpenAI 的 JavaScript 客户端:
npm install @ai-sdk/openai然后在代码中引入,并在 llmScraping() 函数中实例化你的 LLM 模型:
// other imports...
import { openai } from "@ai-sdk/openai"

// ...

const llm = openai.chat("gpt-4o")
如果要使用其他集成方式,可参阅 官方 llm-scraper 的文档。
为避免在代码中硬编码 OpenAI 的密钥,可以安装 dotenv:
npm install dotenv在 scraper.ts 中引入 dotenv 并调用 dotenv.config() 以加载环境变量:
// other imports...
import * as dotenv from "dotenv"

// ...

dotenv.config()
借此,你即可通过 .env 文件来加载环境变量,如你的 OpenAI API Key。为此,在项目中添加一个 .env 文件:
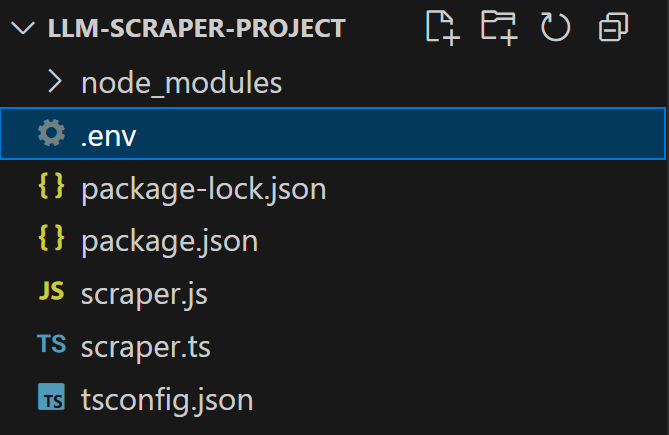
打开并写入你的 OpenAI API Key:
OPENAI_API_KEY="<YOUR_OPENAI_KEY>"将 <YOUR_OPENAI_KEY> 替换为你的实际 OpenAI Key。
注意,无需在代码中手动读取此环境变量,因为 @ai-sdk/openai 默认会尝试读取 OPENAI_KEY 环境变量。
非常好!LLM 集成已经完成。
第 4 步:连接到目标页面
llm-scraper 基于 Playwright 来实现浏览器自动化和页面内容的提取。在 llmScraping() 函数中添加以下代码:
- 初始化一个 Chromium 浏览器
- 打开一个新页面
- 让 Playwright 访问目标页面
具体实现如下:
const browser = await chromium.launch()
const page = await browser.newPage()

await page.goto("https://books.toscrape.com/catalogue/a-light-in-the-attic_1000/index.html")
最后,不要忘记在脚本结束时关闭浏览器释放资源:
await page.close()
await browser.close()
如果你对该流程不熟悉,详见我们关于 Playwright 抓取网页 的指南。
第 5 步:定义数据 Schema
现在,llm-scraper 的工作原理是将从页面(通过 Playwright 获取)提取的内容加上一个提示(prompt)传递给底层的 LLM,来完成数据提取并返回符合某个数据模型的结构化结果。
此时就需要用到 Zod 来在 TypeScript 中定义你的数据模型。要弄清适合本案例的 Schema,可先在浏览器中打开目标页面,并从页面顶部开始分析:
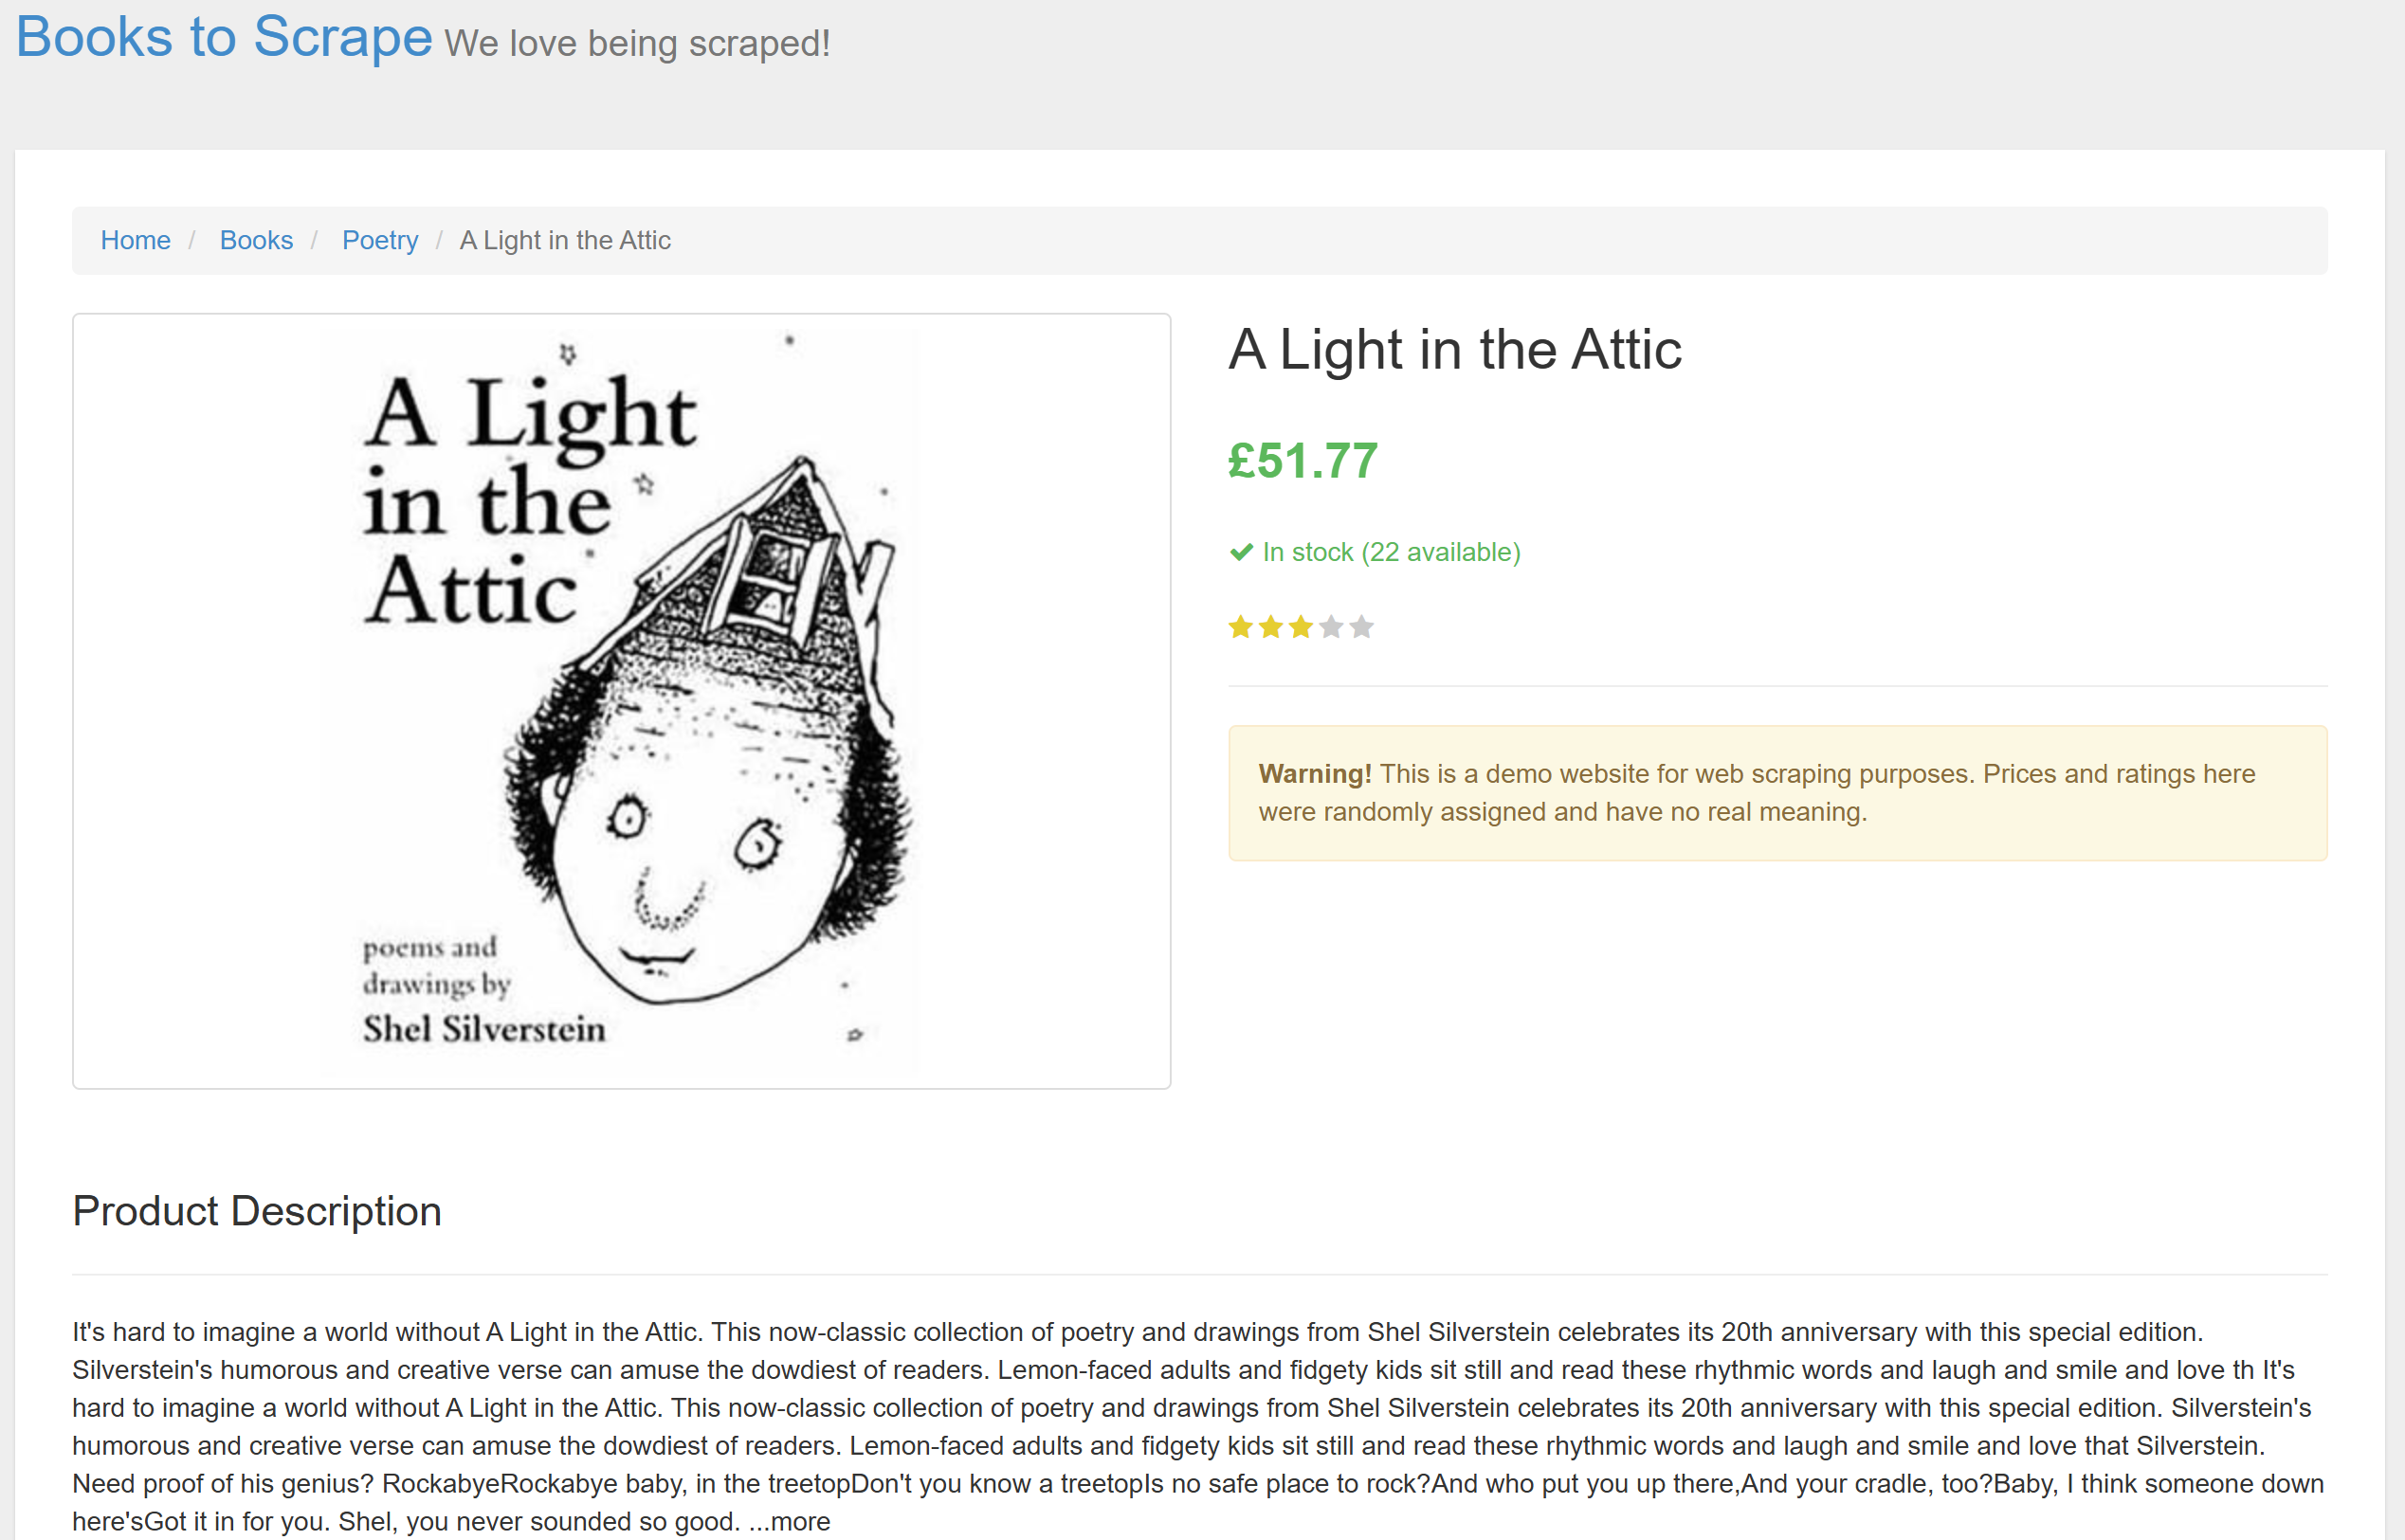
可以先聚焦提取下列字段:
- Title(标题)
- Price(价格)
- Stock status(库存状态)
- Quantity(数量)
- Description(描述)
接着看看页面底部区域:
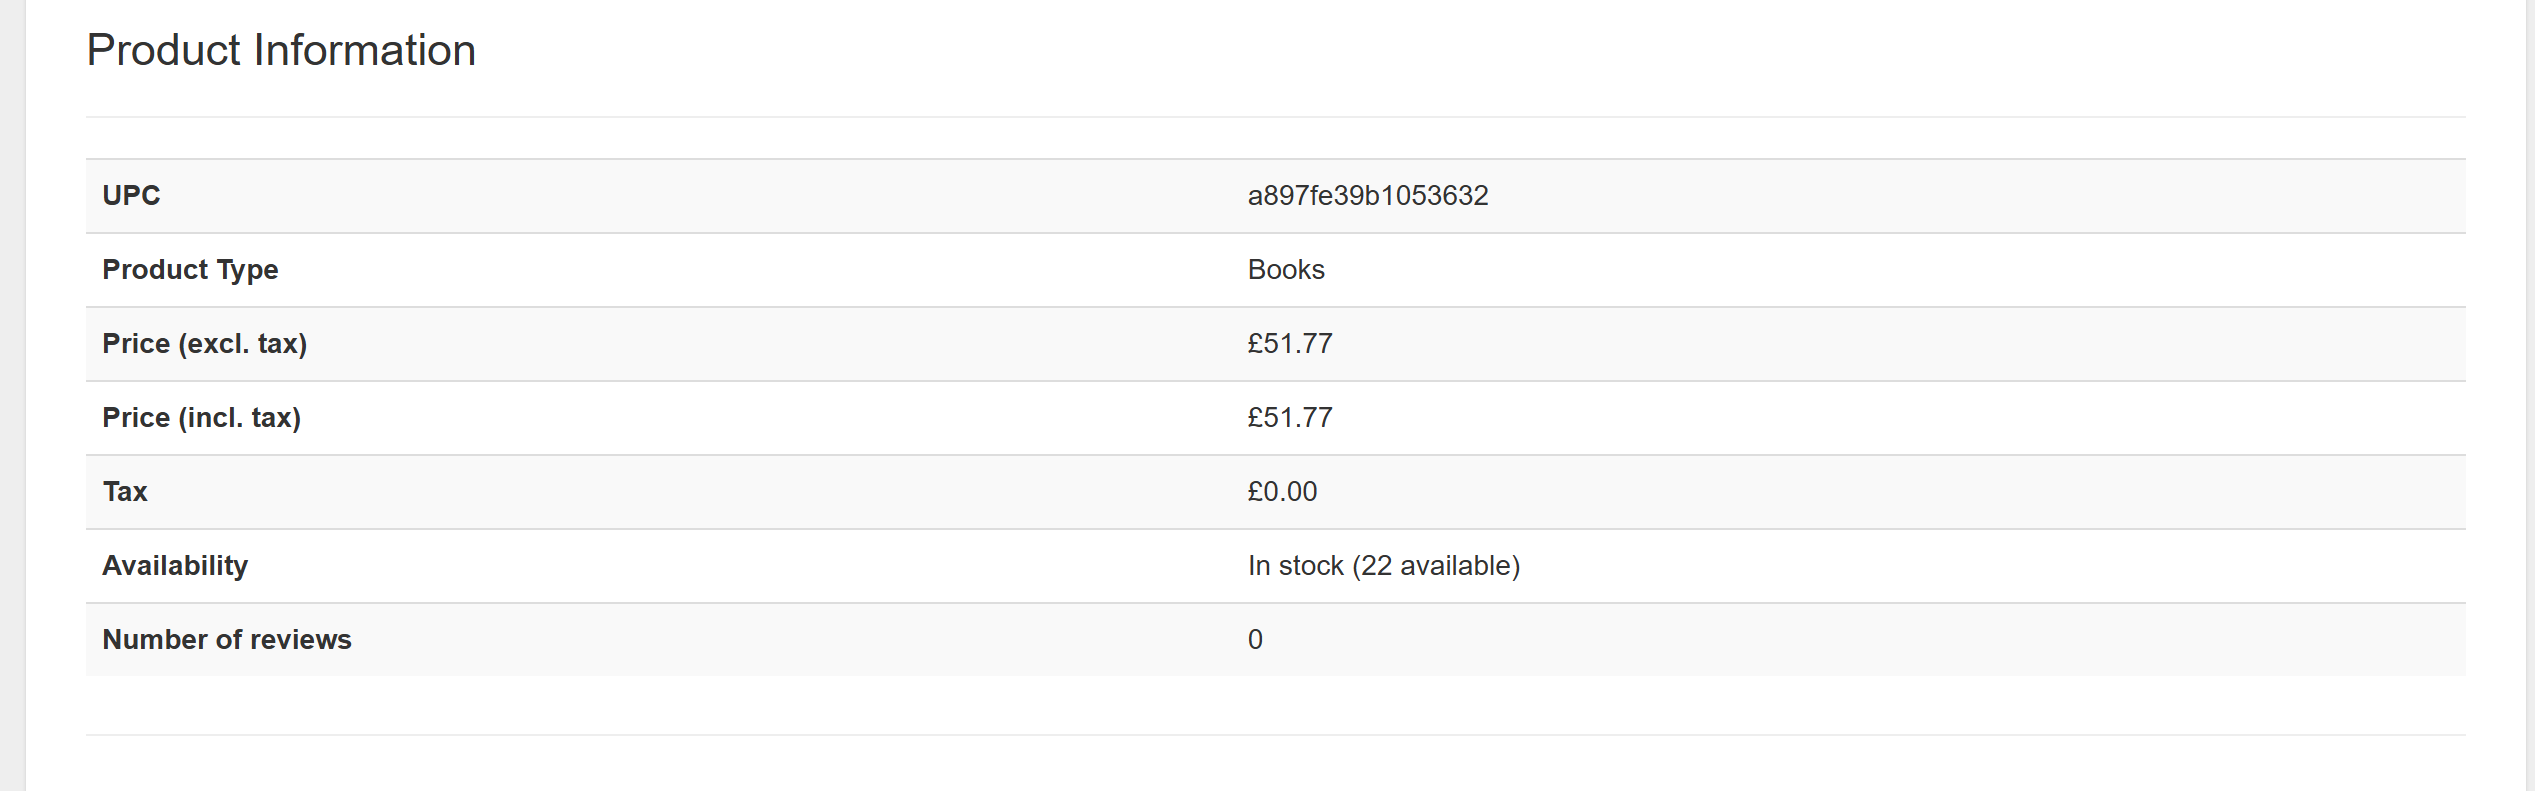
这里可能需要:
- UPC(通用产品代码)
- Product type(产品类型)
- Tax(税率)
- Number of reviews(评论数)
综合这些信息,我们可以定义如下产品 Schema:
const productSchema = z.object({
  title: z.string().describe("The name of the product"),
  price: z.string().describe("The price of the product, typically formatted as a string like '£19.99'"),
  stock: z.string().describe("The availability status of the product, such as 'In Stock' or 'Out of Stock'"),
  quantity: z.string().describe("The specific quantity of products available in stock"),
  description: z.string().describe("A detailed description of the product, including features and specifications"),
  upc: z.string().describe("The Universal Product Code (UPC) to uniquely identify the product"),
  productType: z.string().describe("The category or type of the product, such as 'Books', 'Clothing', etc."),
  tax: z.string().describe("Information about the applicable tax amount for the product"),
  reviews: z.number().describe("The number of reviews the product has received"),
})小贴士:别忘了在 Schema 中加入描述(describe),这会帮助 LLM 更好理解需要处理的数据。
很好!接下来就可以调用 llm-scraper 运行内容提取任务了。
第 6 步:运行抓取任务
先使用第 3 步中定义的 LLM 对象来创建一个 LLMScraper 实例:
const scraper = new LLMScraper(llm)这是 llm-scraper 提供的核心对象,用来执行 AI 驱动的抓取任务。
然后,用如下方式运行抓取:
const { data } = await scraper.run(page, productSchema, {
  format: "markdown",
})
format 参数指定将页面内容以何种形式传递给 LLM,可选值包括:
"html":原始 HTML。"text":从页面提取的纯文本。"markdown":将 HTML 内容转换成 Markdown。"cleanup":对提取的文本进行清洗后再发送。"image":发送页面截图。
注意:如果需要,也可以提供一个自定义函数来控制内容格式化。
就如同“为什么新一代 AI Agent 喜欢使用 Markdown 而不是 HTML?”一文指出的,用 Markdown 可以节省 tokens 并加快抓取过程。
最后,scraper.run() 返回的对象会与 Zod 的类型定义保持一致。
至此,AI 驱动的抓取已完成。
第 7 步:导出抓取到的数据
目前,抓取到的数据保存在一个 JavaScript 对象中。为了方便访问、分析或共享,通常可以将其导出到 JSON 文件:
const jsonData = JSON.stringify(data, null, 4)
await fs.writeFile("product.json", jsonData, "utf8")
此操作不需要用到外部库,只需在 scraper.ts 顶部引入:
import { promises as fs } from "fs"第 8 步:整合所有步骤
现在,scraper.ts 文件的完整内容如下:
import { z } from "zod"
import { chromium } from "playwright"
import LLMScraper from "llm-scraper"
import { openai } from "@ai-sdk/openai"
import * as dotenv from "dotenv"
import { promises as fs } from "fs"

// load the environment variables from the local .env file
dotenv.config()

async function llmScraping() {
  // initialize the LLM engine
  const llm = openai.chat("gpt-4o")

  // launch a browser instance and open a new page
  const browser = await chromium.launch()
  const page = await browser.newPage()

  // navigate to the target e-commerce product page
  await page.goto("https://books.toscrape.com/catalogue/a-light-in-the-attic_1000/index.html")

  // define the product schema
  const productSchema = z.object({
    title: z.string().describe("The name of the product"),
    price: z.string().describe("The price of the product, typically formatted as a string like '£19.99'"),
    stock: z.string().describe("The availability status of the product, such as 'In Stock' or 'Out of Stock'"),
    quantity: z.string().describe("The specific quantity of products available in stock"),
    description: z.string().describe("A detailed description of the product, including features and specifications"),
    upc: z.string().describe("The Universal Product Code (UPC) to uniquely identify the product"),
    productType: z.string().describe("The category or type of the product, such as 'Books', 'Clothing', etc."),
    tax: z.string().describe("Information about the applicable tax amount for the product"),
    reviews: z.number().describe("The number of reviews the product has received"),
  })

  // create a new LLMScraper instance
  const scraper = new LLMScraper(llm)

  // run the LLM scraper
  const { data } = await scraper.run(page, productSchema, {
    format: "markdown", // or "html", "text", etc.
  })

  // conver the scraped data to a JSON string
  const jsonData = JSON.stringify(data, null, 4)
  // populate an output file with the JSON string
  await fs.writeFile("product.json", jsonData, "utf8")

  // close the page and the browser and release their resources
  await page.close()
  await browser.close()
}

llmScraping()可以看到,llm-scraper 让你用极少量的代码就能在 JavaScript 中定义爬虫脚本。
运行以下命令将 TypeScript 编译为 JavaScript:
npx tsc成功后,你的项目将出现 scraper.js 文件。执行它:
node scraper.js程序执行完毕后,你将看到同目录下生成一个名为 product.json 的文件。
打开后,类似如下内容:
{
  "title": "A Light in the Attic",
  "price": "£51.77",
  "stock": "In Stock",
  "quantity": "22",
  "description": "It's hard to imagine a world without A Light in the Attic. This now-classic collection of poetry and drawings from Shel Silverstein celebrates its 20th anniversary with this special edition. Silverstein's humorous and creative verse can amuse the dowdiest of readers. Lemon-faced adults and fidgety kids sit still and read these rhythmic words and laugh and smile and love that Silverstein. Need proof of his genius? Rockabye Rockabye baby, in the treetop Don't you know a treetop Is no safe place to rock? And who put you up there, And your cradle, too? Baby, I think someone down here's Got it in for you. Shel, you never sounded so good.",
  "upc": "a897fe39b1053632",
  "productType": "Books",
  "tax": "£0.00",
  "reviews": 0
}
这与目标页面上呈现的信息完全匹配,而无需编写任何定制化解析逻辑,这就是 LLM 的强大之处。干得好!
进一步:使用 llm-scraper 进行代码生成
llm-scraper 同样支持在给定 Schema 的前提下自动生成底层 Playwright 数据解析逻辑,这得益于 generate() 函数。
示例如下:
const { code } = await scraper.generate(page, productSchema)它会接收 Playwright 的 page 对象和 Zod 的 schema,并返回一段包含生成好的 Playwright 代码的字符串。示例输出如下:
(function() {
function extractData() {
const title = document.querySelector('h1').innerText;
const price = document.querySelector('.price_color').innerText;
const stockText = document.querySelector('.instock.availability').innerText.trim();
const stock = stockText.includes('In stock') ? 'In Stock' : 'Out of Stock';
const quantityMatch = stockText.match(/d+/);
const quantity = quantityMatch ? quantityMatch[0] : '0';
const description = document.querySelector('#product_description ~ p').innerText;
const upc = document.querySelector('th:contains("UPC") + td').innerText;
const productType = document.querySelector('th:contains("Product Type") + td').innerText;
const tax = document.querySelector('th:contains("Tax") + td').innerText;
const reviews = parseInt(document.querySelector('th:contains("Number of reviews") + td').innerText, 10);
    return {
        title,
        price,
        stock,
        quantity,
        description,
        upc,
        productType,
        tax,
        reviews
    };
}

const data = extractData();
console.log(data);
})()
然后,你可以在代码中执行这段生成的 JavaScript 并解析结果:
const result = await page.evaluate(code)
const data = schema.parse(result)
data 将与第 6 步的结果一致。
llm-scraper 的替代方案
llm-scraper 并非市面上唯一的 LLM 抓取库。其他一些值得关注的项目包括:
- Crawl4AI:一个 Python 库,用于构建高性能、适配 AI 的网页爬虫代理与数据管线。非常灵活,开发者可快速且精确地完成部署。它在我们 介绍 Crawl4AI 抓取 的教程中有相应示例。
- ScrapeGraphAI:一个 Python 网页抓取库,将 LLM 与直接的图结构相结合,支持抓取网站和本地文档(XML、HTML、JSON、Markdown 等)。可参考我们关于 使用 ScrapeGraphAI 进行抓取 的指南。
这种抓取方式的局限性
我们在此使用的 ToScrape 站点(顾名思义)是一个专门用来做抓取测试的开放站点,并未做任何反爬限制。但如果将 llm-scraper 应用到真实世界的电商网站时,你会发现难度会大大提升…
原因在于:电商公司和在线业务都清楚其数据的价值,即使这些数据是在公众页面上公开展示,他们也会采取各种防爬措施来保护。即使像 Playwright 这类浏览器自动化解决方案在遇到这些手段时也不一定能轻松绕过。
例如,臭名昭著的 亚马逊验证码 足以让许多爬虫束手无策:
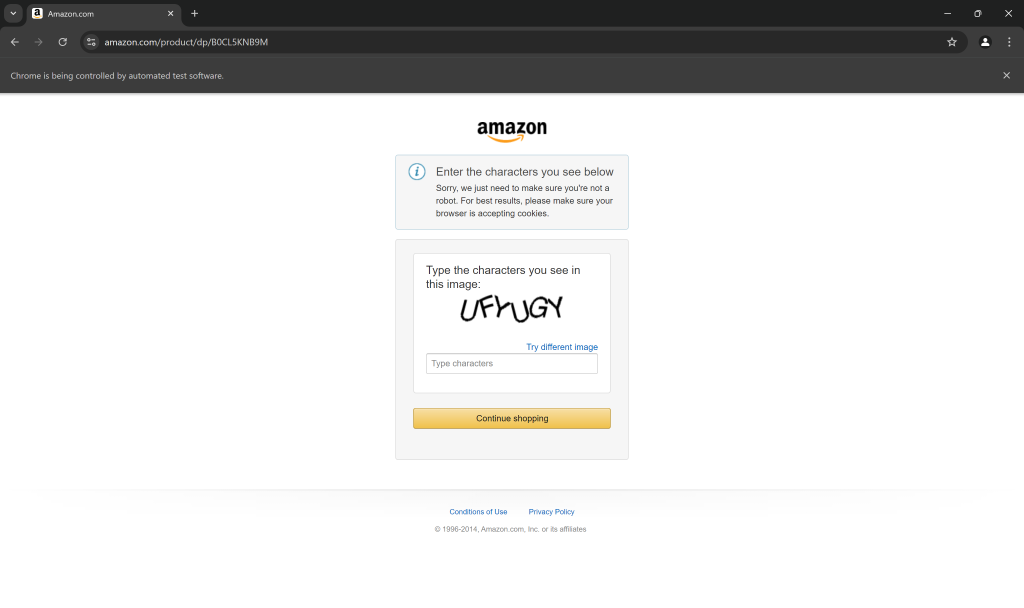
即便你能通过 Playwright 绕过验证码,对于超量自动请求导致的 IP 封锁也会令你的抓取停止运转。
此时,问题就不在于不断对脚本进行复杂化改动,而是在于是否用对了工具。
如果在使用 Playwright 的同时,结合抓取浏览器这样的专为抓取而生的浏览器,事情就会简单得多。它是一个云端浏览器,专门为抓取而优化,自动处理 IP 轮换、自动重试、高级反爬绕过,以及对验证码的内置解决方案,无需你管理任何基础设施。
想要在 llm-scraper 中把 Playwright 替换为 Scraping Browser,只需像官方文档所示那样进行集成,就能把它当作一个常规浏览器来使用。
总结
在本文中,你了解了 llm-scraper 的优势,以及如何使用它在 TypeScript 中构建一个 AI 驱动的爬虫。得益于 LLM 的能力,你可以在页面结构复杂或动态变化的场景下快速抓取数据。
正如我们所讨论的,要想避免被封锁,最有效的方法就是与 Bright Data 的抓取浏览器搭配使用,该方案内置版的验证码识别与反爬绕过机制可以助你一臂之力。
如果你对直接基于此方案构建 AI Agent 感兴趣,可以看看 Agent Browser。它可以在远程浏览器上执行 Agent 驱动的工作流,不会遭受阻挡,并且拥有无限的扩展能力,背后依托全球最可靠的代理网络。
现在就创建一个 Bright Data 免费账号,探索更多数据与抓取解决方案,助力你的 AI 之旅吧!


技术写作
 5.5 years experience
Antonello是一名软件工程师,但他更喜欢称自己为技术传教士。通过写作传播知识是他的使命。