
本文将讨论:
使用前端 JavaScript 进行网页抓取
对于网页抓取而言,前端 JavaScript 是一种带有局限性的解决方案。首先,这是由于必须直接从浏览器控制面板运行 JavaScript 的网页抓取脚本。这并不是一种可以通过编程方式执行的操作。
特别是,可以从控制面板的页面抓取数据,如下所示:
其次,如果想要从其他网页抓取数据,则必须通过 AJAX 进行下载。但是不要忘记,网络浏览器对 AJAX 采用同源政策。因此,在使用前端 JavaScript 的情况下,仅限访问同一来源内的网页。
让我们举一个简单的例子来理解这意味着什么。假设当前正在访问来自 brightdata.com的页面。然后,前端 JavaScript 网页抓取脚本只能下载 brightdata.com 域下的网页。
请注意,这并不意味着 JavaScript 不是一款优秀的网络爬取技术。实际上,Node.js 允许在服务器上运行 JavaScript,并且可以避免上述两项局限。
现在让我们了解如何使用 Node.js 构建 JavaScript 网页抓取工具。
先决条件
在开始开发 Node.js 网页抓取应用程序之前,需要满足以下先决条件列表:
- 带有 npm 8+ 的 Node.js 18+:包括 npm 在内的任何 Node.js 18+ 的长期支持(LTS)版本均可。本教程以 Node.js 18.12 和 npm 8.19 为基础,该版本即为撰写本文时最新 LTS 版本的 Node.js。
- 支持 JavaScript 的集成开发环境(IDE):IntelliJ IDEA 的社区版是本教程所选择的 IDE,不过,任何其他支持 JavaScript 和 Node.js 的 IDE 也都可以。
点击上方链接,按照安装向导进行所需的一切设置。可以通过在终端中启动以下命令来验证 Node.js 是否已正确安装:
node -v应返回的内容类似如下:
v18.12.1同样,通过以下操作可以验证 npm 是否已正确安装
npm -v 应返回的字符串如下所示:
8.19.2上面的两个命令分别指示计算机上全局可用的 Node.js 和 npm 版本。
大功告成!要想查看如何在 Node.js 中执行 JavaScript 网页抓取,当前已准备就绪!
适用于 Node.js 的最佳 JavaScript 网页抓取库
让我们来探索一下 Node.js 中最适合网页抓取的 JavaScript 库:
- Axios – 该库使用便捷,可协助在 JavaScript 中发出 HTTP 请求。Axios 在浏览器和 Node.js 中均可使用,它是目前可供使用的最为热门的 JavaScript HTTP 客户端之一。
- Cheerio – 作为轻量级库,提供类似 jQuery 的应用程序接口(API)来浏览 HTML 和 XML 文档。可以使用 Cheerio 来解析 HTML 文档,选择 HTML 元素,然后从中提取数据。换言之,Cheerio 可以提供高级网页抓取 API。
- Selenium – 支持多种编程语言的库,可用于为 Web 应用程序构建自动测试。也可以利用其无头浏览器功能来进行网页抓取。详情请参阅我们的 Selenium 网页抓取指南。
- Playwright – 一款用于为微软开发的网络应用程序创建自动测试脚本的工具。它提供了一种指示浏览器执行特定操作的方法。因此,可以使用 Playwright 进行网页抓取,作为一种无头浏览器解决方案。
- Puppeteer – 一款用于自动测试 Google 开发的网络应用程序的工具。Puppeteer 建立在 Chrome DevTools 协议之上。与 Selenium 和 Playwright 相同,它允许像真人用户一样以编程方式与浏览器进行交互。详细了解 Selenium 和 Puppeteer 之间的区别。
在 Node.js 中构建 JavaScript 网页抓取工具
接下来将学习如何在 Node.js 中构建 JavaScript 网页抓取工具,以便自动从网站提取数据。具体而言,目标网页即为 Bright Data 主页。Node.js 网页抓取过程的目标在于从页面选择感兴趣的 HTML 元素,从中检索数据,并将所抓取的数据转换为更加实用的格式。
在撰写本文时,Bright Data 主页如下所示:
正如所注意到的,Bright Data 主页包含大量不同格式的数据和信息,从文字描述到图像不等。此外,它还包含很多各种用途的链接。下面将学习如何检索所有这些数据。
现在让我们在分步教程中了解如何使用 Node.js 抓取数据!
第 1 步:设置 Node.js 项目
首先,使用以下命令创建包含 Node.js 网页抓取项目的文件夹:
mkdir web-scraper-nodejs现在应出现一个空白的 web-scraper-nodejs 目录。请注意,可以为项目文件夹命名任何想要的名称。使用以下命令进入文件夹:
cd web-scraper-nodejs现在,使用以下命令初始化 npm 项目:
npm init -y该命令将设置一个全新的 npm 项目。请注意,要让 npm 在不经过交互式过程的情况下初始化默认项目,必须使用 -y 标志。如果省略了 -y 标志,则终端会询问一些问题。
web-scraper-nodejs 现在应该包含 package.json,如下所示:
{ u0022nameu0022: u0022web-scraper-nodejsu0022, u0022versionu0022: u00221.0.0u0022, u0022descriptionu0022: u0022u0022, u0022mainu0022: u0022index.jsu0022, u0022scriptsu0022: { u0022testu0022: u0022echo u0022Error: no test specifiedu0022 u0026u0026 exit 1u0022 }, u0022keywordsu0022: [], u0022authoru0022: u0022u0022, u0022licenseu0022: u0022ISCu0022 }
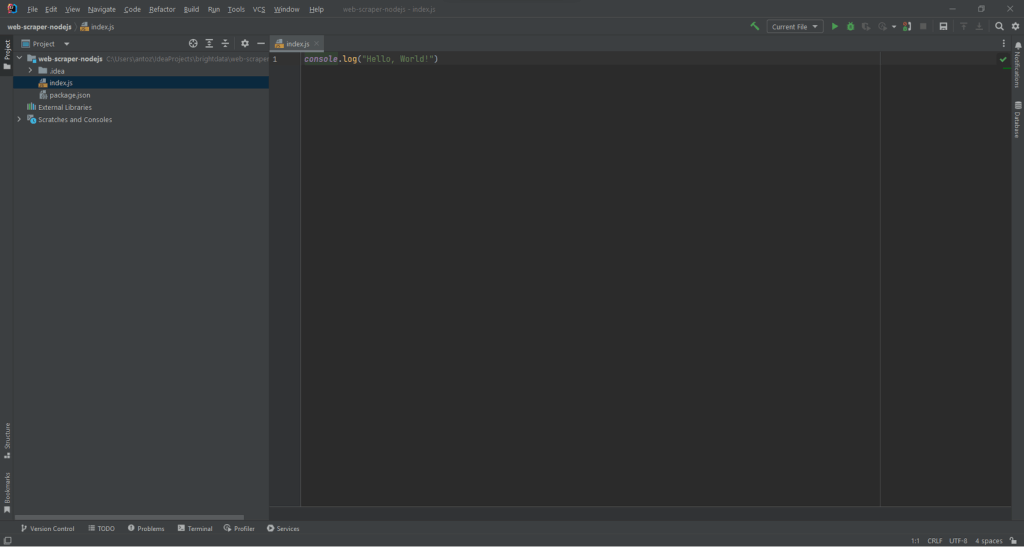
现在,在项目的根文件夹中创建 index.js 文件,并将其初始化如下:
// index.js

console.log("Hello, World!")
此 JavaScript 文件将包含 Node.js 网页抓取逻辑。
打开 package.json 文件,并在 scripts 部分添加以下脚本:
"start": "node index.js"现在可以在终端中运行以下命令来启动 Node.js 脚本:
npm run start这一操作应返回的内容如下:
Hello, World!这意味着 Node.js 应用程序运行正常。现在,在集成开发环境(IDE)中打开项目,准备好在 Node.js 中写入一些抓取逻辑!
如果是 IntelliJ IDEA 用户,则应看到以下内容:
第 2 步:安装 Axios 和 Cheerio
现在即可在 Node.js 中安装实现网页抓取工具所需的附属项。要确定应该采用哪种 JavaScript 网页抓取库,请访问目标网页,右键单击空白部分,然后选择“检查”(Inspect)选项。此操作应该会打开浏览器的 DevTools 窗口。在“网络”(Network)选项卡中,查看 “Fetch/XHR” 部分。
来自目标页面的 AJAX 请求并未显示重要数据;相反,所需信息直接存在于网页的源代码中,这通常适用于在服务器端渲染的站点。这意味着该页面不需要 JavaScript 来显示内容或获取数据,因此无需使用无头浏览器进行抓取。为了避免使用浏览器带来的额外负载,更简单的解决方案是将 Cheerio 与 Axios 一起使用,这样可以更高效地运行,且避免不必要的复杂性。
因此,可以使用以下命令安装 Cheerio 和 Axios:
npm install cheerio axios然后,通过在 index.js 添加以下两行代码来导入 Cheerio 和 Axios:
// index.js

const cheerio = require("cheerio")
const axios = require("axios")
现在,让我们用代码编写一个使用 Cheerio 和 Axios 执行网页抓取的 Node.js 网页抓取脚本!
第 3 步:下载目标网站
通过以下几行代码使用 Axios 连接到目标网站:
// downloading the target web page
// by performing an HTTP GET request in Axios
const axiosResponse = await axios.request({
    method: "GET",
    url: "https://brightdata.com",
})
由于成功使用了 Axios 的 request() 方法,可以执行任何 HTTP 请求。具体而言,如果想下载网页的源代码,则必须对其 URL 执行 HTTP GET 请求。通常,Axios 会立即返回 Promise。可以等待 Promise 并使用 await 关键字同步获取其值。
请注意,如果 request() 失败,则显示“错误” 。出现这种情况可能有多种原因,可能包括无效 URL 或服务器暂不可用等。另外,别忘了防抓取措施目前已多有实施。其中一种最常见的方法就是阻止未包含有效用户代理(User-Agent) HTTP 标头的请求。进一步了解用于网页抓取的User-Agent。
默认情况下,Axios 将使用以下 User-Agent:
axios <axios_version>这并非浏览器所使用的 User-Agent 的外观。因此,防抓取技术可能会检测到并屏蔽 Node.js 网页抓取工具。
通过向传递给 request() 的对象添加以下属性,在 Axios 中设置有效的 User-Agent 标头:
headers: {
    "User-Agent": "Mozilla/5.0 (Windows NT 10.0; Win64; x64) AppleWebKit/537.36 (KHTML, like Gecko) Chrome/108.0.0.0 Safari/537.36"
}标头属性允许在 Axios 中设置任何 HTTP 标头。
index.js 文件当前应显示如下:
// index.js

const cheerio = require("cheerio")
const axios = require("axios")

async function performScraping() {
    // downloading the target web page
    // by performing an HTTP GET request in Axios
    const axiosResponse = await axios.request({
        method: "GET",
        url: "https://brightdata.com",
        headers: {
    "User-Agent": "Mozilla/5.0 (Windows NT 10.0; Win64; x64) AppleWebKit/537.36 (KHTML, like Gecko) Chrome/108.0.0.0 Safari/537.36"
        }
    })
}

performScraping()
请注意,只能在标有 async 的函数中使用 await。正因如此,必须将 JavaScript 网页抓取逻辑嵌入到 async performScraping() 函数中。
现在,让我们花点时间分析目标网页,以此来定义网页抓取策略。
第 4 步:检查 HTML 页面
如果查看 Bright Data 主页,则会看到可以应用 Bright Data 的行业列表。这些可以作为值得抓取的有趣数据。
右键单击以下 HTML 元素之一并选择“检查”(Inspect):

通过分析所选节点的 HTML 代码,将会看到该卡片是一个 HTML 元素。具体而言,此 包含:
- 一个
- 一个 HTML 元素,其中包含行业字段的名称
现在,注意表征这些 HTML 元素的层叠样式表(CSS)类别。通过使用这些类别,将能够定义从 DOM 中选择这些 HTML 元素所需的 CSS 选择器。详细来说,需要注意到 .e-container 卡片包含在 .elementor-element-7a85e3a8
之中。然后,给定一张卡片,可以使用以下 CSS 选择器提取其所有相关数据:
.elementor-image-box-img img.elementor-image-box-content .elementor-image-box-title
同理,可以应用相同的逻辑来定义所需的 CSS 选择器:
- 提取 Bright Data 成为行业领导者的原因。
- 选择 Bright Data 所提供的客户体验成为市场上最佳客户体验的原因。
换句话说,目标网页有三个抓取目标:
- 有关可以应用 Bright Data 的行业数据。
- 有关 Bright Data 之所以成为行业领导者的数据。
- 有关 Bright Data 为何提供业内最佳客户体验的数据。
第 5 步:使用 Cheerio 选择 HTML 元素
Cheerio 提供了几种从网页中选择 HTML 元素的方法。但是,首先必须使用以下命令初始化 Cheerio:
// parsing the HTML source of the target web page with Cheerio
const $ = cheerio.load(axiosResponse.data)
Cheerio 的 load() 方法接受字符串形式的 HTML 内容。请注意,Axios 响应对象在数据属性中包含由 HTTP 请求返回的数据。在这种情况下,数据将存储服务器所返回网页的 HTML 源代码。因此,可将 axiosResponse.data 传递给 load() 来初始化 Cheerio。
由于 Cheerio 的语法与 jQuery 基本相同,因此应调用 Cheerio 变量 $。这样,就能从互联网上复制 jQuery 代码段。
可以通过使用 Cheerio 的类别来选择 HTML 元素:
const htmlElement = $(".elementClass")同样,可以通过 ID 检索 HTML 元素,方法如下:
const htmlElement = $("#elementId")具体而言,可以通过将任何有效的 CSS 选择器传递给 $ 来选择 HTML 元素,如同 jQuery 中的操作一样。还可以使用 find() 方法连接选择逻辑:
// retrieving the list of industry cards
const industryCards = $(".elementor-element-7a85e3a8").find(".e-container")
find() 允许访问由 CSS 选择器筛选的当前 HTML 元素的后代。然后,可以使用 each() 方法对 Cheerio 节点列表进行迭代,如下所示:
// iterating over the list of industry cards
$(".elementor-element-7a85e3a8")
    .find(".e-container")
    .each((index, element) => {
         // scraping logic...
    })
接下来让我们学习如何使用 Cheerio 从感兴趣的 HTML 元素中提取数据。
第 6 步:使用 Cheerio 从目标网页抓取数据
可以扩展前文显示的逻辑,从选定的 HTML 元素中提取所需数据,如下所示:
// initializing the data structure
// that will contain the scraped data
const industries = []

// scraping the "Learn how web data is used in your market" section
$(".elementor-element-7a85e3a8")
    .find(".e-container")
    .each((index, element) => {
        // extracting the data of interest
        const pageUrl = $(element).attr("href")
        const image = $(element).find(".elementor-image-box-img img").attr("data-lazy-src")
        const name = $(element).find(".elementor-image-box-content .elementor-image-box-title").text()

        // filtering out not interesting data
        if (name && pageUrl) {
            // converting the data extracted into a more
            // readable object
            const industry = {
                url: pageUrl,
                image: image,
                name: name
            }

            // adding the object containing the scraped data
            // to the industries array
            industries.push(industry)
        }
    })
该 Node.js 网页抓取代码段从 Bright Data 主页中选择了所有行业卡片。然后,它将遍历所有 HTML 卡片元素。针对每张卡片,它会抓取与卡片、图片和行业名称相关的网页 URL。由于成功使用了 Cheerio 的 attr() 和 text() 方法,可以对 HTML 属性值和文本进行分别检索。最后,它将抓取的数据存储在一个对象中,并将其添加到 industries 数组中。
在 each() 循环的末尾,industries 将包含与第一个抓取目标相关的所有数据。现在让我们了解一下如何实现另外两个目标。
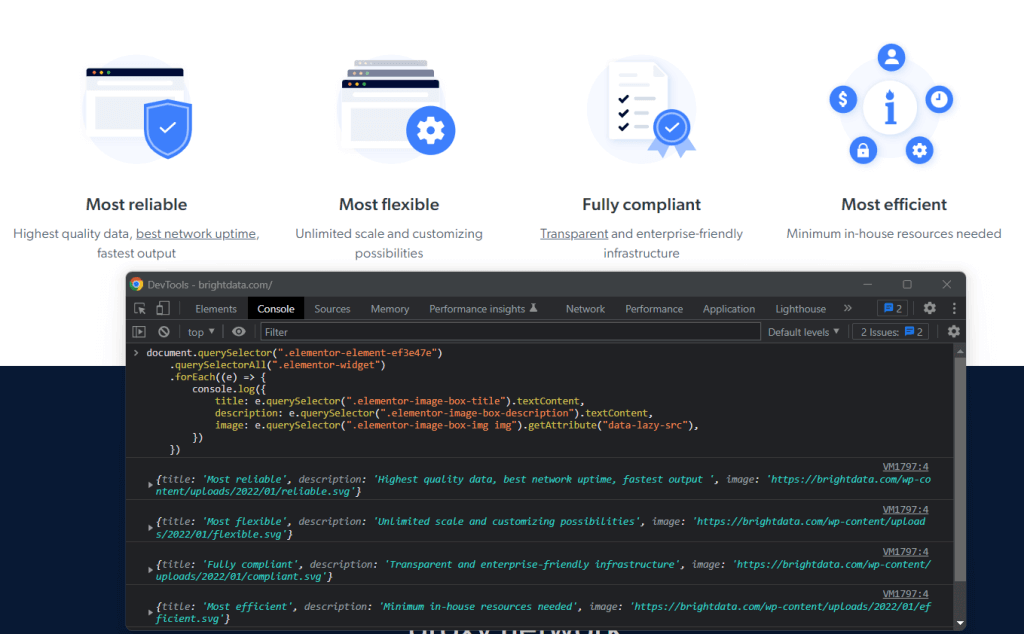
同样,可以按如下方式抓取数据以证明 Bright Data 作为行业领导者的原因:
const marketLeaderReasons = []

// scraping the "What makes Bright Data
// the undisputed industry leader" section
$(".elementor-element-ef3e47e")
    .find(".elementor-widget")
    .each((index, element) => {
        const image = $(element).find(".elementor-image-box-img img").attr("data-lazy-src")
        const title = $(element).find(".elementor-image-box-title").text()
        const description = $(element).find(".elementor-image-box-description").text()

        const marketLeaderReason = {
            title: title,
            image: image,
            description: description,
        }

        marketLeaderReasons.push(marketLeaderReason)
    })
最后,则可以通过以下方式来抓取有关 Bright Data 为何提供出色客户体验的数据:
const customerExperienceReasons = []
// scraping the "The best customer experience in the industry" section
$(".elementor-element-288b23cd .elementor-text-editor")
    .find("li")
    .each((index, element) => {
        const title = $(element).find("strong").text()
        // since the title is part of the text, you have
        // to remove it to get only the description
        const description = $(element).text().replace(title, "").trim()

        const customerExperienceReason = {
            title: title,
            description: description,
        }

        customerExperienceReasons.push(customerExperienceReason)
    })
恭喜!你已经学会了如何达成 Node.js 网页抓取的全部三个目标!
请记住,可以通过点击当前页面中发现的链接从其他网页抓取数据。这正是网络爬取的目的所在。因此,也可以定义网页抓取逻辑来从这些页面提取数据。
industries、 marketLeaderReasons、 customerExperienceReasons 将把所有抓取的数据存储在 JavaScript 对象中。让我们学习如何将其转换为更为实用的格式。
第 7 步:将提取的数据转换为 JSON
就 JavaScript 而言,JSON 是其中一种最佳数据格式。这是由于 JSON 源自 JavaScript,是 API 通常用于接受或返回数据的格式。因此,很可能必须将 JavaScript 抓取的数据转换为 JSON。可通过以下逻辑轻松达成这一目标:
// trasforming the scraped data into a general object
const scrapedData = {
    industries: industries,
    marketLeader: marketLeaderReasons,
    customerExperience: customerExperienceReasons,
}

// converting the scraped data object to JSON
const scrapedDataJSON = JSON.stringify(scrapedData)
首先,必须创建一个包含所有抓取数据的 JavaScript 对象。然后,可以使用 JSON.stringify() 将该 JavaScript 对象转换为 JSON。
scrapedDataJSON 将包含以下 JSON 数据:
{
  "industries": [
    {
      "url": "https://brightdata.com/use-cases/ecommerce",
      "image": "https://brightdata.com/wp-content/uploads/2022/07/E_commerce.svg",
      "name": "E-commerce"
    },

    // ...

    {
      "url": "https://brightdata.com/use-cases/data-for-good",
      "image": "https://brightdata.com/wp-content/uploads/2022/07/Data_for_Good_N.svg",
      "name": "Data for Good"
    }
  ],
  "marketLeader": [
    {
      "title": "Most reliable",
      "image": "https://brightdata.com/wp-content/uploads/2022/01/reliable.svg",
      "description": "Highest quality data, best network uptime, fastest output "
    },

    // ...

    {
      "title": "Most efficient",
      "image": "https://brightdata.com/wp-content/uploads/2022/01/efficient.svg",
      "description": "Minimum in-house resources needed"
    }
  ],
  "customerExperience": [
    {
      "title": "You ask, we develop",
      "description": "New feature releases every day"
    },

    // ...

    {
      "title": "Tailored solutions",
      "description": "To meet your data collection goals"
    }
  ]
}
恭喜!我们从连接网站起步,如今已经可以抓取其数据并将其转换为 JSON。现在已经准备好查看完整的网页抓取 Node.js 脚本了。
小结
Node.js 网页抓取工具整体如下所示:
// index.js

const cheerio = require("cheerio")
const axios = require("axios")

async function performScraping() {
    // downloading the target web page
    // by performing an HTTP GET request in Axios
    const axiosResponse = await axios.request({
        method: "GET",
        url: "https://brightdata.com/",
        headers: {
            "User-Agent": "Mozilla/5.0 (Windows NT 10.0; Win64; x64) AppleWebKit/537.36 (KHTML, like Gecko) Chrome/108.0.0.0 Safari/537.36"
        }
    })

    // parsing the HTML source of the target web page with Cheerio
    const $ = cheerio.load(axiosResponse.data)

    // initializing the data structures
    // that will contain the scraped data
    const industries = []
    const marketLeaderReasons = []
    const customerExperienceReasons = []

    // scraping the "Learn how web data is used in your market" section
    $(".elementor-element-7a85e3a8")
        .find(".e-container")
        .each((index, element) => {
            // extracting the data of interest
            const pageUrl = $(element).attr("href")
            const image = $(element).find(".elementor-image-box-img img").attr("data-lazy-src")
            const name = $(element).find(".elementor-image-box-content .elementor-image-box-title").text()

            // filtering out not interesting data
            if (name && pageUrl) {
                // converting the data extracted into a more
                // readable object
                const industry = {
                    url: pageUrl,
                    image: image,
                    name: name
                }

                // adding the object containing the scraped data
                // to the industries array
                industries.push(industry)
            }
        })

    // scraping the "What makes Bright Data
    // the undisputed industry leader" section
    $(".elementor-element-ef3e47e")
        .find(".elementor-widget")
        .each((index, element) => {
            // extracting the data of interest
            const image = $(element).find(".elementor-image-box-img img").attr("data-lazy-src")
            const title = $(element).find(".elementor-image-box-title").text()
            const description = $(element).find(".elementor-image-box-description").text()

            // converting the data extracted into a more
            // readable object
            const marketLeaderReason = {
                title: title,
                image: image,
                description: description,
            }

            // adding the object containing the scraped data
            // to the marketLeaderReasons array
            marketLeaderReasons.push(marketLeaderReason)
        })

    // scraping the "The best customer experience in the industry" section
    $(".elementor-element-288b23cd .elementor-text-editor")
        .find("li")
        .each((index, element) => {
            // extracting the data of interest
            const title = $(element).find("strong").text()
            // since the title is part of the text, you have
            // to remove it to get only the description
            const description = $(element).text().replace(title, "").trim()

            // converting the data extracted into a more
            // readable object
            const customerExperienceReason = {
                title: title,
                description: description,
            }

            // adding the object containing the scraped data
            // to the customerExperienceReasons array
            customerExperienceReasons.push(customerExperienceReason)
        })

    // trasforming the scraped data into a general object
    const scrapedData = {
        industries: industries,
        marketLeader: marketLeaderReasons,
        customerExperience: customerExperienceReasons,
    }

    // converting the scraped data object to JSON
    const scrapedDataJSON = JSON.stringify(scrapedData)

    // storing scrapedDataJSON in a database via an API call...
}

performScraping()
如此处所示,通过不到 100 行代码即可在 Node.js 中构建一个网页抓取工具。通过使用 Cheerio 和 Axios,可以下载 HTML 网页,对其进行解析,然后自动检索其所有数据。随后,可以将抓取数据轻松转换为 JSON。这正是 Node.js 网页抓取的全部内容。
使用以下命令在 Node.js 启动网页抓取工具:
npm run start确实如此!你刚刚学会了如何在 Node.js 执行 JavaScript 网页抓取!
结语
本教程介绍了为什么使用 JavaScript 在前端进行网页抓取是一种具有局限性的解决方案,以及为什么 Node.js 可以作为一种更佳选择。此外,还研究了创建 Node.js 网页抓取脚本需要哪些先决条件,以及如何使用 JavaScript 从网页抓取数据。具体学习了如何根据真实示例,使用 Cheerio 和 Axios 在 Node.js 中创建 JavaScript 网页抓取应用程序。正如你所了解的那样,使用 Node.js 只需几行代码即可进行网页抓取。
不过仍需谨记,网页抓取可能并不那么轻松。这是因为可能仍然需要应对诸多挑战。详细来说,防抓取和反机器人解决方案已变得日益普遍。不过好在,可以使用 Bright Data 提供的下一代高级网页抓取工具轻松避免所有这一切。是否不太愿意处理网页抓取?则请浏览我们的数据集。
如果想进一步了解如何避免遭到屏蔽,可以从多种可用代理服务 中选用一种网络代理,或者开始使用高级 Web 解锁器。


技术写作
 5.5 years experience
Antonello是一名软件工程师,但他更喜欢称自己为技术传教士。通过写作传播知识是他的使命。