在本指南中,您将了解如何利用网络数据对 Llama 4 进行微调:
- 什么是微调
- 如何使用一些抓取应用程序接口检索可进行微调的数据集
- 如何为微调过程设置云基础设施
- 如何通过分步教程微调 Llama 4
让我们深入了解一下!
什么是微调?
微调(Fine-tuning)又称监督微调(SFT),是一个用于提高预训练 LLM 中特定知识或能力的过程。就 LLM 而言,预训练是指从头开始训练人工智能模型。
使用 SFT 是因为模型模拟其训练数据。然而,就目前而言,LLM 主要是通用模型。这意味着,如果想让模型学习特定知识,就必须对其进行微调。
如果您想了解有关 SFT 的更多信息,请阅读我们的 “LLM 中的监督微调 “指南。
搜索数据以微调 LLama 4
要对 LLM 进行微调,您首先需要一个微调数据集。本节将向您介绍如何使用 Bright Data 的Web Scraper API(100 多个域的专用端点)从网站上获取数据,这些端点可为您刮取新鲜数据,并以所需格式获取数据。
目标网页将是亚马逊畅销办公产品页面:
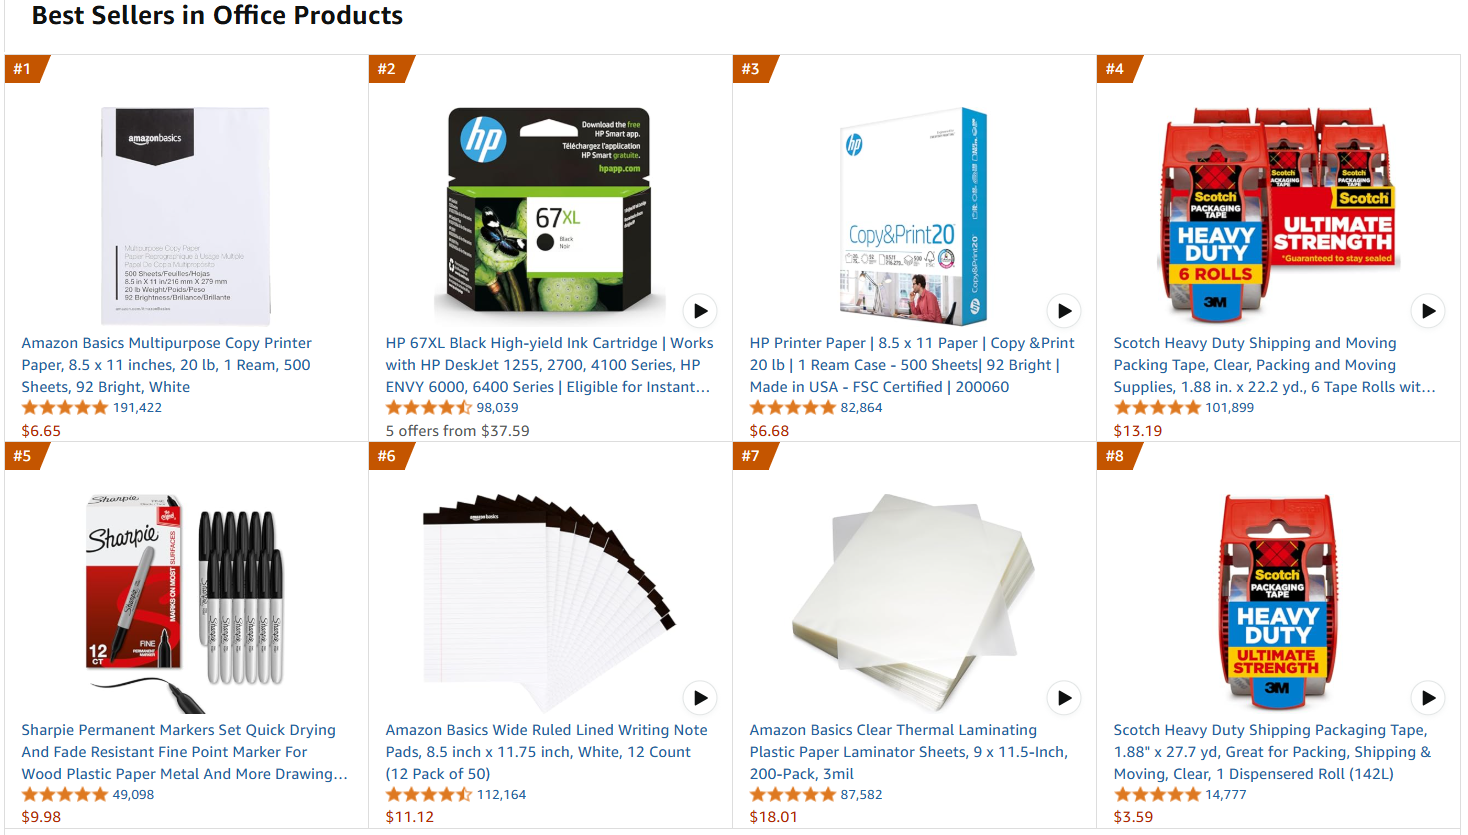
按照以下步骤检索微调数据!
要求
要使用代码从亚马逊检索数据,您需要
- 您的计算机上安装了Python 3.10 或更高版本。
- 有效的 Bright Data Scraper API 密钥。
按照 Bright Data 文档检索您的 API 密钥。
项目结构和依赖关系
假设你将项目的主文件夹命名为amazon_scraper/。这一步结束后,该文件夹的结构如下:
amazon_scraper/
    ├── scraper.py
    └── venv/
在哪里?
scraper.py是包含编码逻辑的 Python 文件。venv/包含虚拟环境。
您可以像这样创建venv/ 虚拟环境目录:
python -m venv venv要激活它,在 Windows 上运行
venvScriptsactivate同样,在 macOS 和 Linux 上,执行
source venv/bin/activate在激活的虚拟环境中,用以下命令安装依赖项:
pip install requests其中,requests是一个用于提出 HTTP 网络请求的库。
太好了!现在您可以使用 Bright Data 的 Scraper API 获取感兴趣的数据了。
步骤 #1:定义抓取逻辑
下面的代码段定义了整个扫描逻辑:
import requests
import json
import time


def trigger_amazon_products_scraping(api_key, urls):
    # Endpoint to trigger the Web Scraper API task
    url = "https://api.brightdata.com/datasets/v3/trigger"

    params = {
        "dataset_id": "gd_l7q7dkf244hwjntr0",
        "include_errors": "true",
        "type": "discover_new",
        "discover_by": "best_sellers_url",
    }

    # Convert the input data in the desired format to call the API
    data = [{"category_url": url} for url in urls]

    headers = {
      "Authorization": f"Bearer {api_key}",
      "Content-Type": "application/json",
    }

    response = requests.post(url, headers=headers, params=params, json=data)

    if response.status_code == 200:
        snapshot_id = response.json()["snapshot_id"]
        print(f"Request successful! Response: {snapshot_id}")
        return response.json()["snapshot_id"]
    else:
        print(f"Request failed! Error: {response.status_code}")
        print(response.text)

def poll_and_retrieve_snapshot(api_key, snapshot_id, output_file, polling_timeout=20):
    snapshot_url = f"https://api.brightdata.com/datasets/v3/snapshot/{snapshot_id}?format=json"
    headers = {
        "Authorization": f"Bearer {api_key}"
    }

    print(f"Polling snapshot for ID: {snapshot_id}...")

    while True:
        response = requests.get(snapshot_url, headers=headers)

        if response.status_code == 200:
            print("Snapshot is ready. Downloading...")
            snapshot_data = response.json()

            # Write the snapshot to an output json file
            with open(output_file, "w", encoding="utf-8") as file:
                json.dump(snapshot_data, file, indent=4)

            print(f"Snapshot saved to {output_file}")
            return
        elif response.status_code == 202:
            print(F"Snapshot is not ready yet. Retrying in {polling_timeout} seconds...")
            time.sleep(polling_timeout)
        else:
            print(f"Request failed! Error: {response.status_code}")
            print(response.text)
            break

if __name__ == "__main__":
    BRIGHT_DATA_API_KEY = "<your api key>" # Replace it with your Bright Data's Web Scraper API key or read it from the envs
    # URLs of best-selling products to retrieve data from
    urls = [
        "https://www.amazon.com/gp/bestsellers/office-products/ref=pd_zg_ts_office-products"
    ]
    snapshot_id = trigger_amazon_products_scraping(BRIGHT_DATA_API_KEY, urls)
    poll_and_retrieve_snapshot(BRIGHT_DATA_API_KEY, snapshot_id, "amazon-data.json")
此代码
- 创建
触发器_amazon_products_scraping()函数,通过它启动网络搜索任务:- 定义要触发的 Scraper API 端点。
- 设置抓取活动的参数。
- 将输入
URL格式化为 API 期望的 JSON 结构。 - 使用指定的端点、标头、参数和数据向 Bright Data Scraper API 发送
POST请求。 - 管理响应状态。
- 创建
poll_and_retrieve_snapshot()函数,用于检查抓取任务(由快照 ID标识)的状态,并在准备就绪后检索数据。
请注意,只使用一个 URL 调用了抓取 API。因此,上述代码只能从一个目标亚马逊页面获取数据。这对于本教程的范围来说已经足够,但您也可以根据自己的喜好在列表中添加任意多个亚马逊 URL。
考虑到添加的 URL 越多,数据集的规模就会越大。数据集越大,如果策划得当,意味着微调效果越好。另一方面,数据集越大,所需的计算时间就越长。
完美!您的抓取逻辑已定义明确,现在可以运行脚本了。
步骤 #2:运行脚本
要抓取目标网页,运行脚本时请使用
python scraper.py您将得到如下结果:
Request successful! Response: s_m9in0ojm4tu1v8h78
Polling snapshot for ID: s_m9in0ojm4tu1v8h78...
Snapshot is not ready yet. Retrying in 20 seconds...
# ...
Snapshot is not ready yet. Retrying in 20 seconds...
Snapshot is ready. Downloading...
Snapshot saved to amazon-data.json
流程结束后,项目文件夹中将包含
amazon_scraper/
    ├── scraper.py
    ├── amazon-data.json # <-- Note the fine-tuning dataset
└── venv/该过程会自动创建包含抓取数据的amazon-data.json文件。下面是 JSON 文件的预期结构:
[
    {
        "title": "Amazon Basics Multipurpose Copy Printer Paper, 8.5 x 11 inches, 20 lb, 1 Ream, 500 Sheets, 92 Bright, White",
        "seller_name": "Amazon.com",
        "brand": "Amazon Basics",
        "description": "Product Description Amazon Basics Multipurpose Copy Printer Paper, 8.5 x 11 Inch 20Lb Paper - 1 Ream (500 Sheets), 92 GE Bright White From the Manufacturer AmazonBasics",
        "initial_price": 6.65,
        "currency": "USD",
        "availability": "In Stock",
        "reviews_count": 190989,
        "categories": [
            "Office Products",
            "Office & School Supplies",
            "Paper",
            "Copy & Printing Paper",
            "Copy & Multipurpose Paper"
        ],
        ...
      // omitted for brevity...
}
非常好!您已成功从亚马逊抓取数据并将其保存为 JSON 文件。这个 JSON 文件就是稍后微调过程中要用到的微调数据集。
设置拥抱脸以使用 Llama 4
您要使用的模型是来自 Hugging Face 的Llama-4-Scout-17B-16E-Instruct模型。
如果您以前从未使用过 Hugging Face,当您第一次点击链接时,系统会要求您创建一个账户:
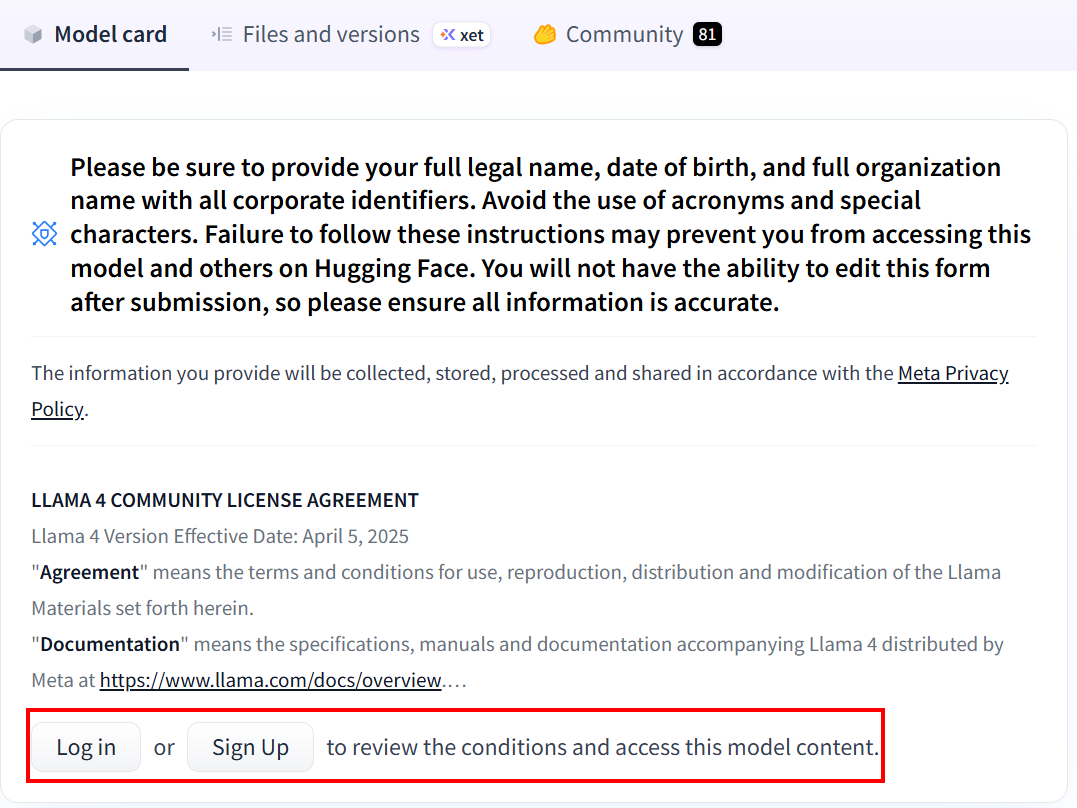
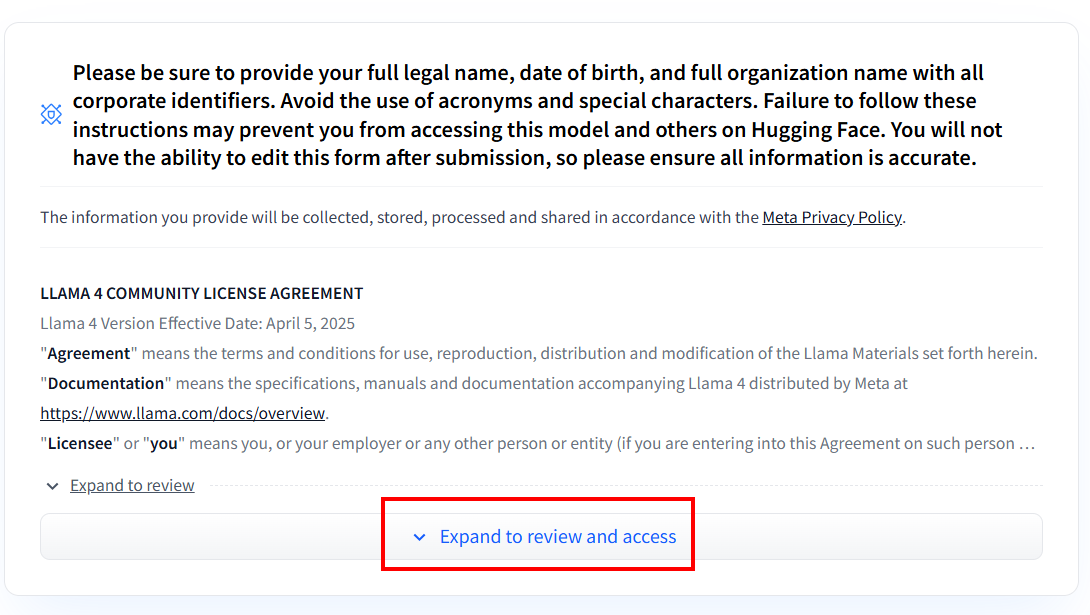
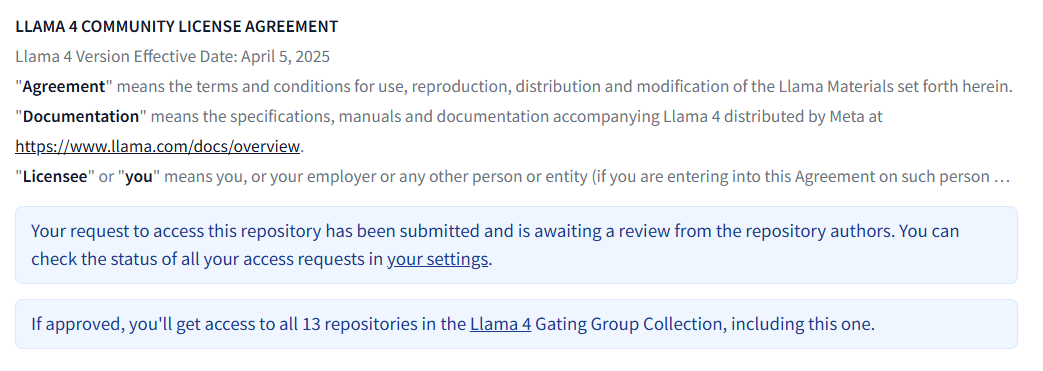
创建账户后,如果您从未使用过任何 Llama 4 型号,则需要填写协议书。点击 “展开查看和访问”,阅读并填写表格:
填写表格后,我们将对您的申请进行审核:
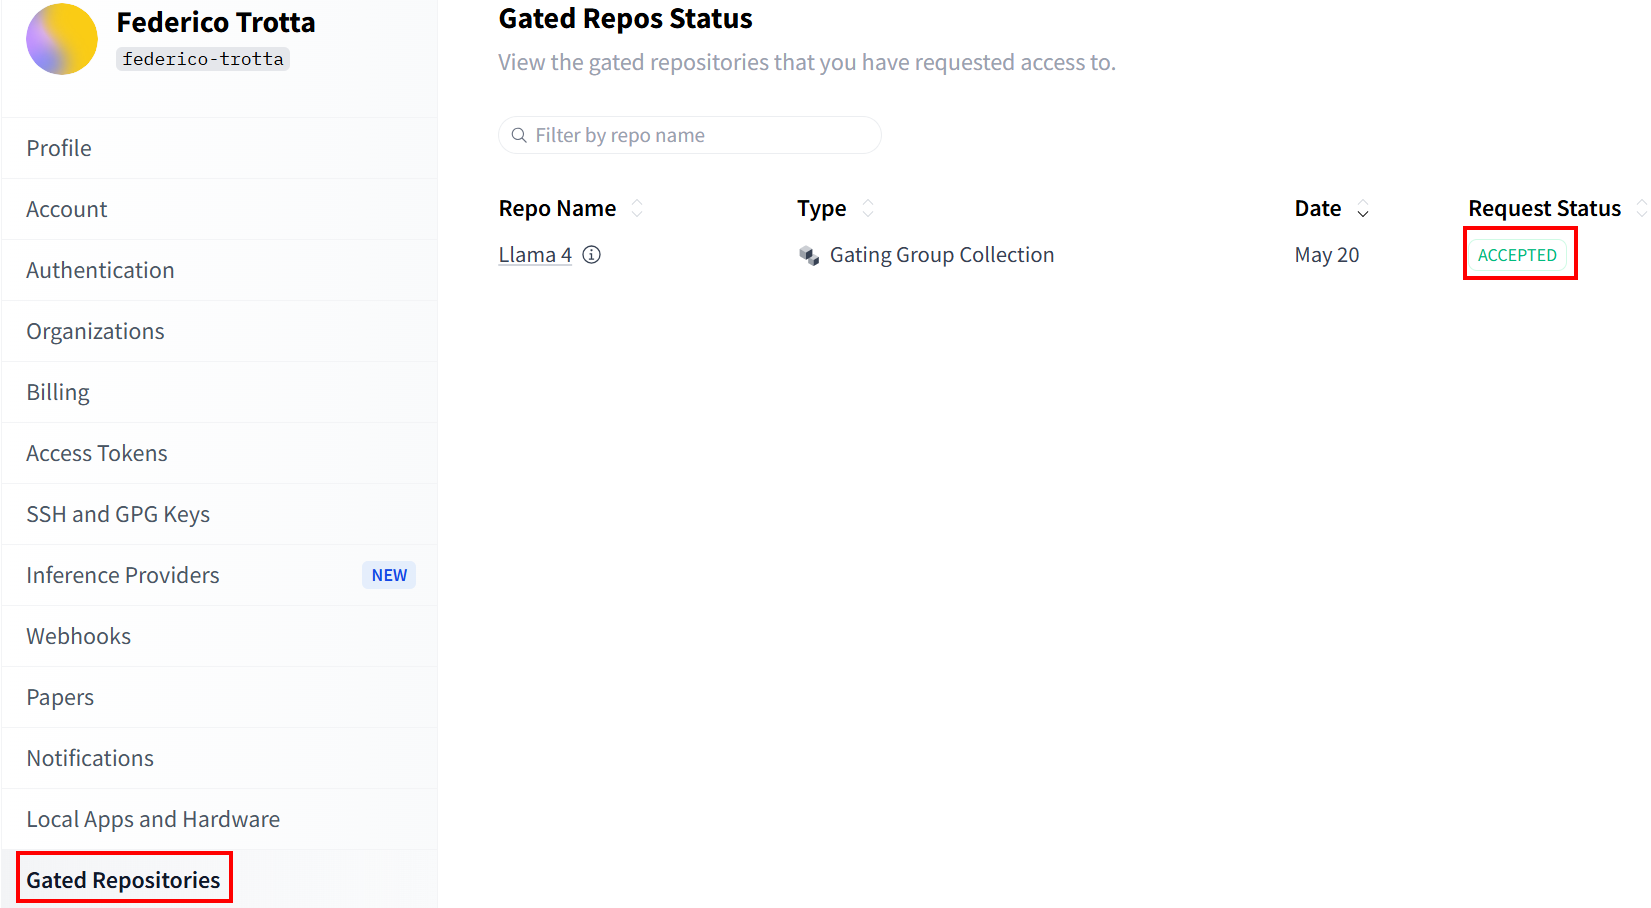
在 “受控存储库“部分查看您的申请状态:
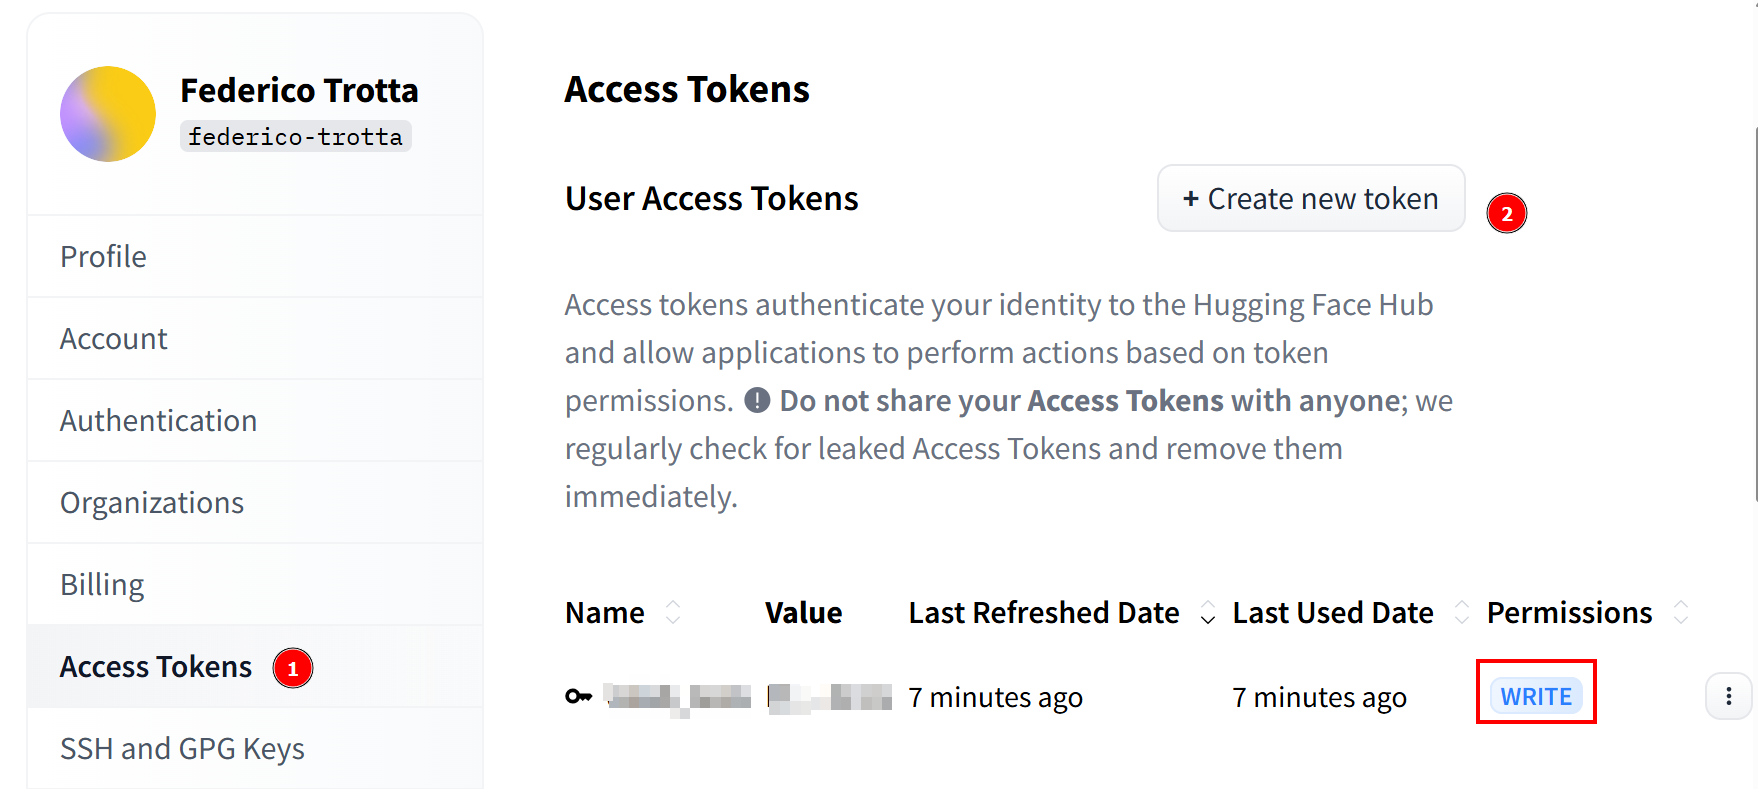
一旦您的请求被接受,您就可以创建一个新的令牌。进入“访问令牌“,创建一个具有写入权限的令牌。然后,将其复制并保存到安全的地方,以便以后使用:
万岁!您已经完成了使用带有 “拥抱脸 “的 Llama 4 模型的所有必要步骤。
设置云基础设施以微调 Llama 4
Llama 4 模型非常大,它们的名字可以帮助您了解它们有多大。例如,Llama-4-Scout-17B-16E-Instruct意味着它有 170 亿个参数和128 个专家。
微调过程需要使用之前获取的微调数据集来训练模型。由于模型有 170 亿个参数,因此需要大量硬件才能完成。具体来说,您需要一个以上的 GPU。因此,您将使用云服务来执行微调过程。
在本教程中,您将使用 RunPod 作为云服务。访问 “RunPod“并创建账户。然后,进入 “计费 “菜单,使用信用卡充值 25 美元:

注:您将立即支付 25 美元,RunPod 将为您的账户添加相当于 25 美元的点数。您将每小时消耗信用点数,这取决于您的 pod 在部署时将运行多少小时。因此,只有当您确定可以使用时才部署。否则,您将在未实际使用的情况下消耗信用点数。每小时的实际消耗量取决于您在接下来的步骤中选择的 GPU 类型和数量。
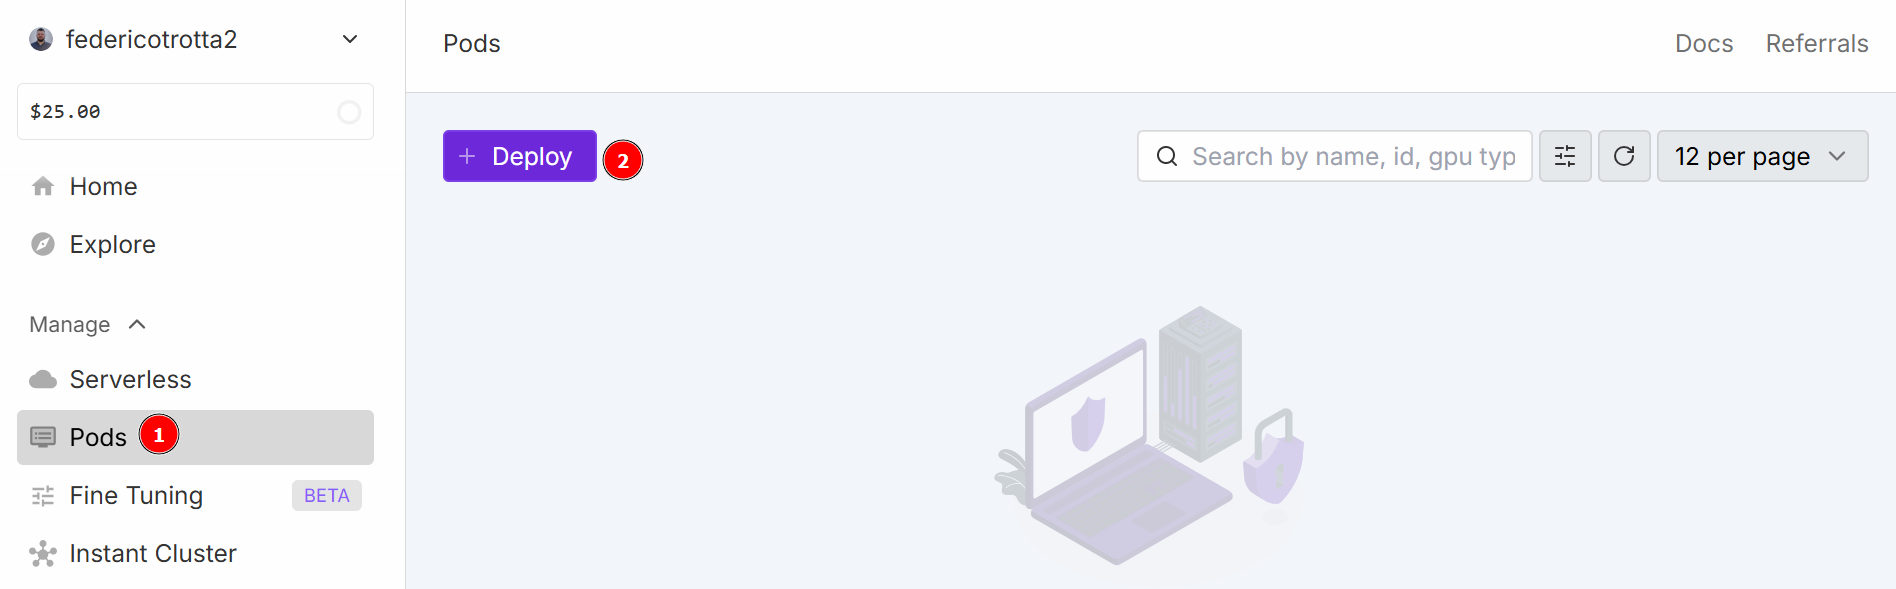
导航至 “Pods “菜单,开始配置 pod。pod 可作为虚拟服务器,为您提供执行任务所需的 CPU、GPU、内存和存储空间。单击 “部署 “按钮:
您可以选择不同的配置:
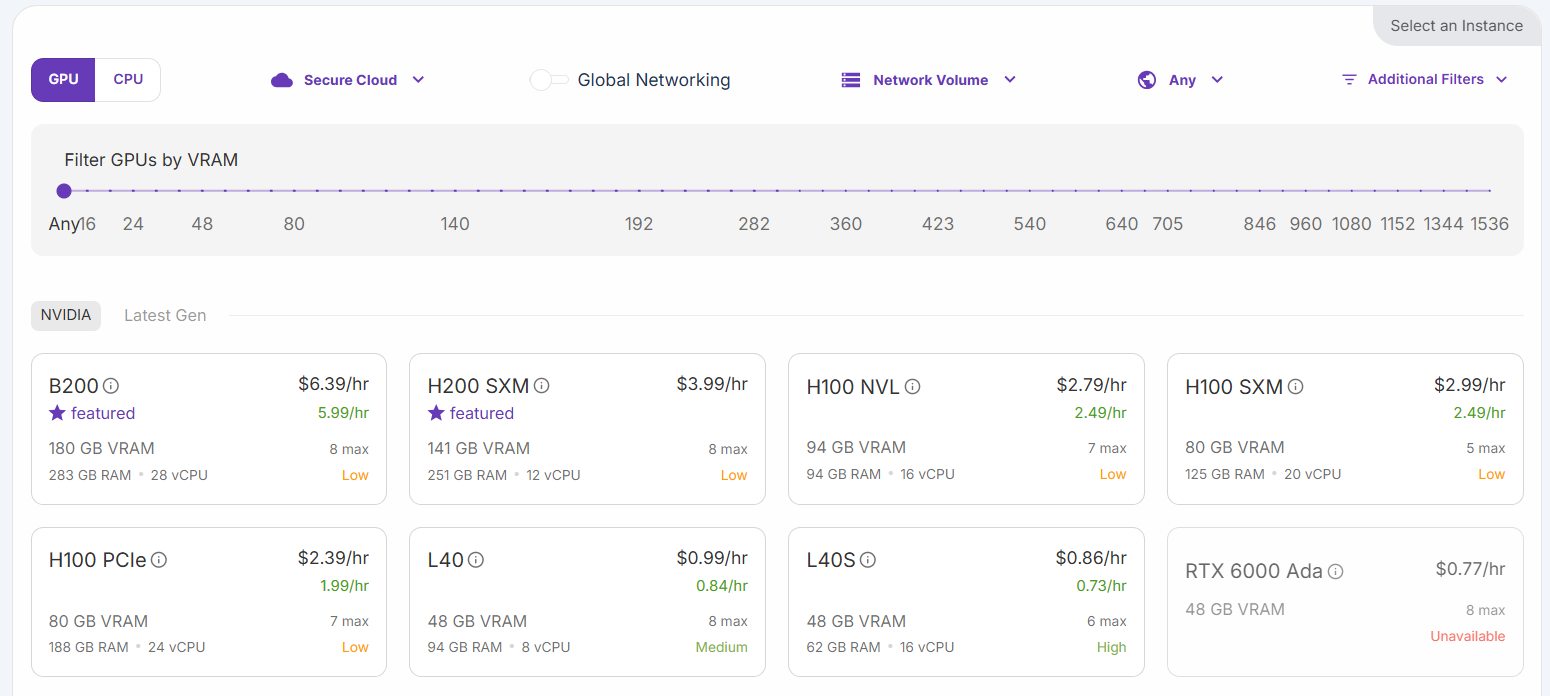
选择 “H200 SXM GPU “选项。给 pod 命个名,并选择 GPU 的数量。本教程使用 3 个 GPU 即可:

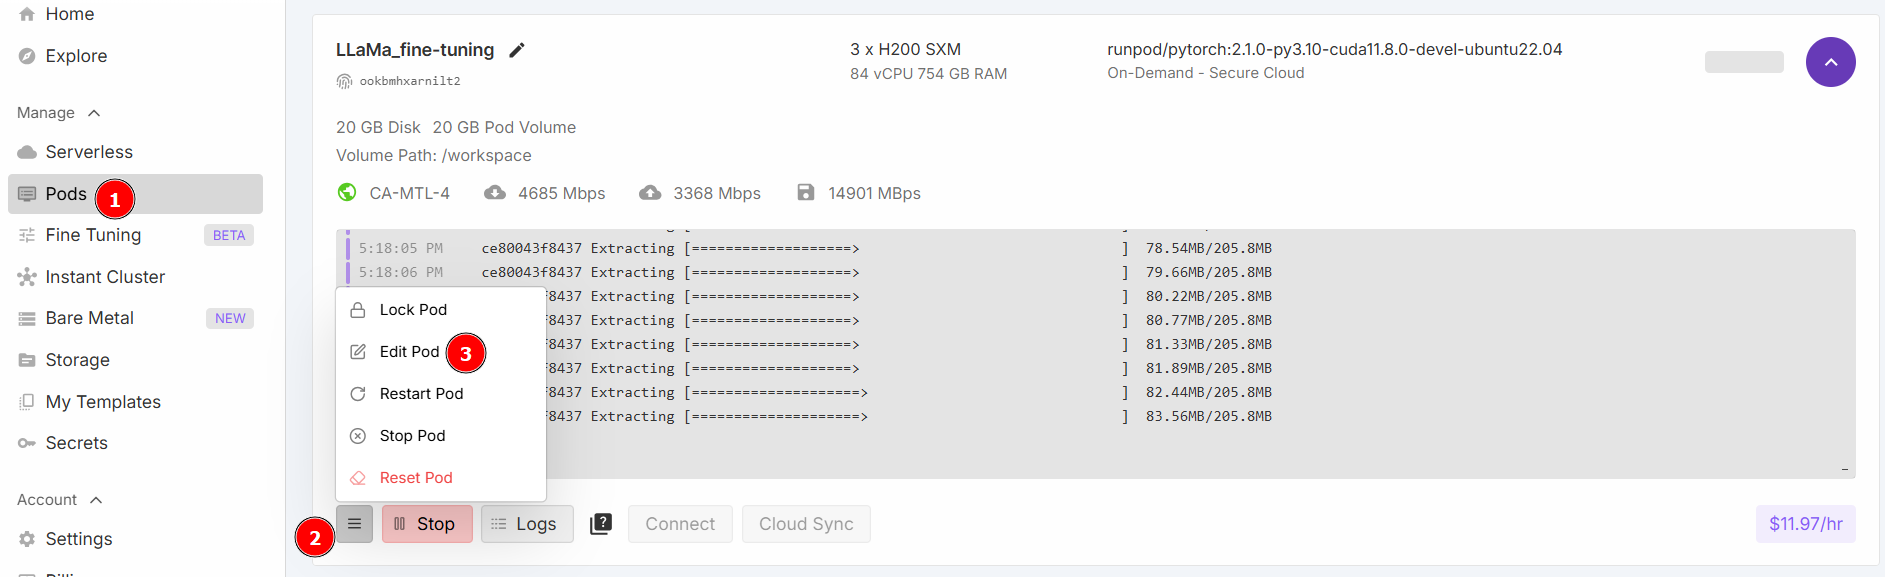
选择 “启动 Jupyter 笔记本”,然后点击 “按需部署”。现在,转到 “Pods “部分并编辑你的 Pod:
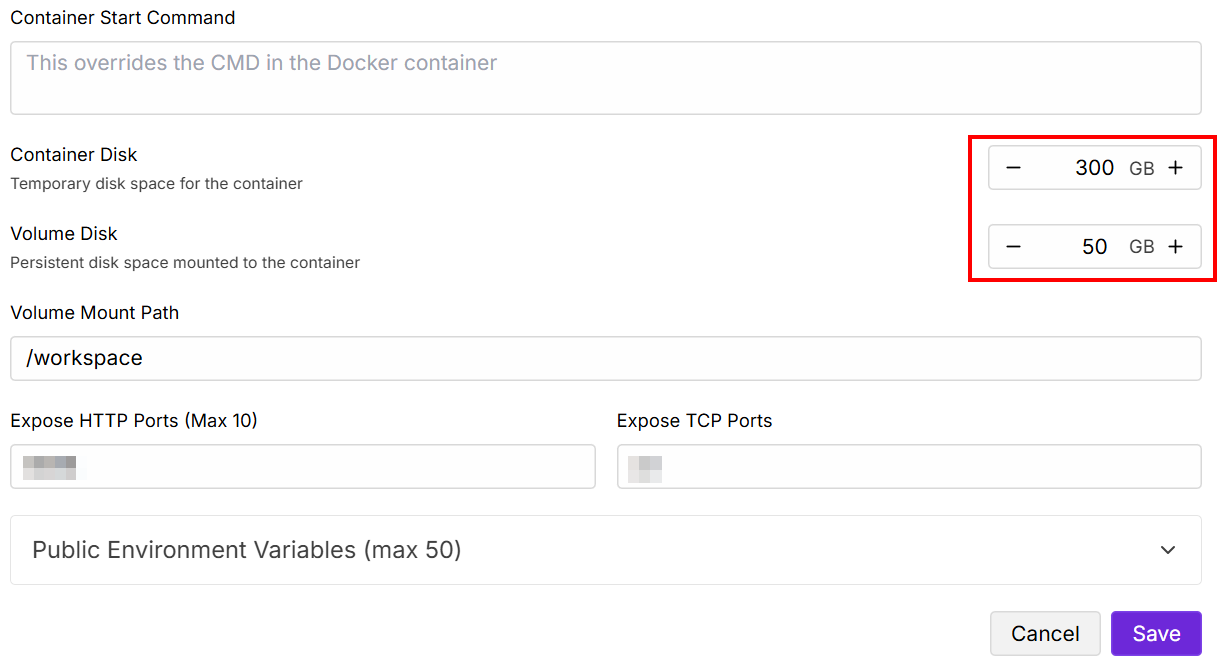
更改 “包含磁盘 “和 “卷磁盘 “值如下,然后保存:
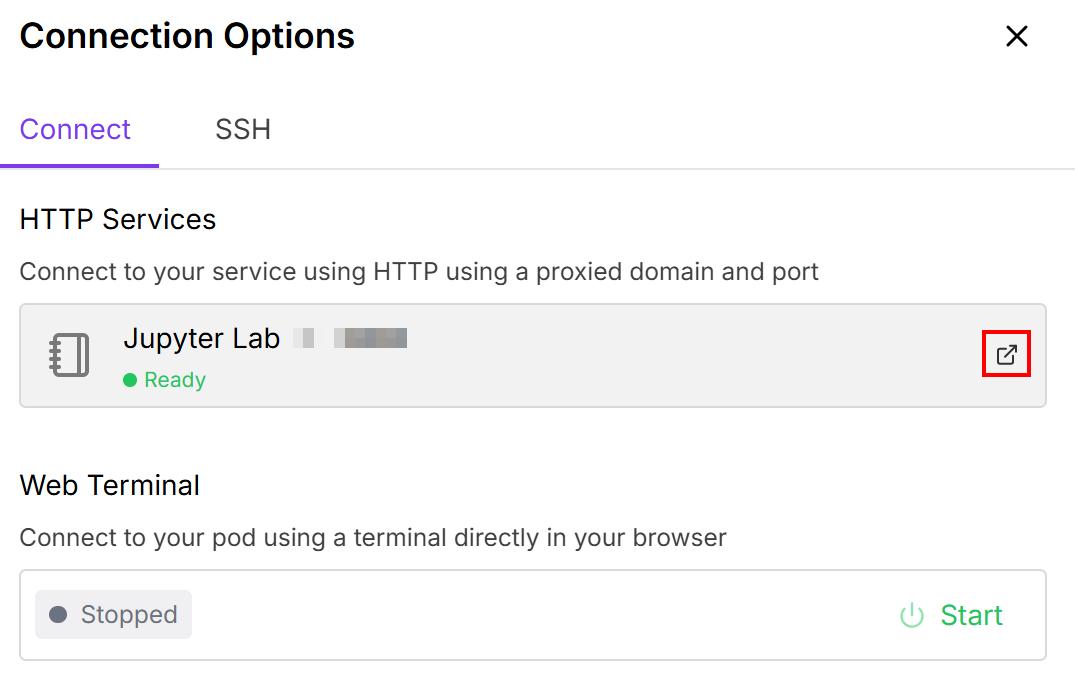
设置完成后,点击 “连接 “按钮:
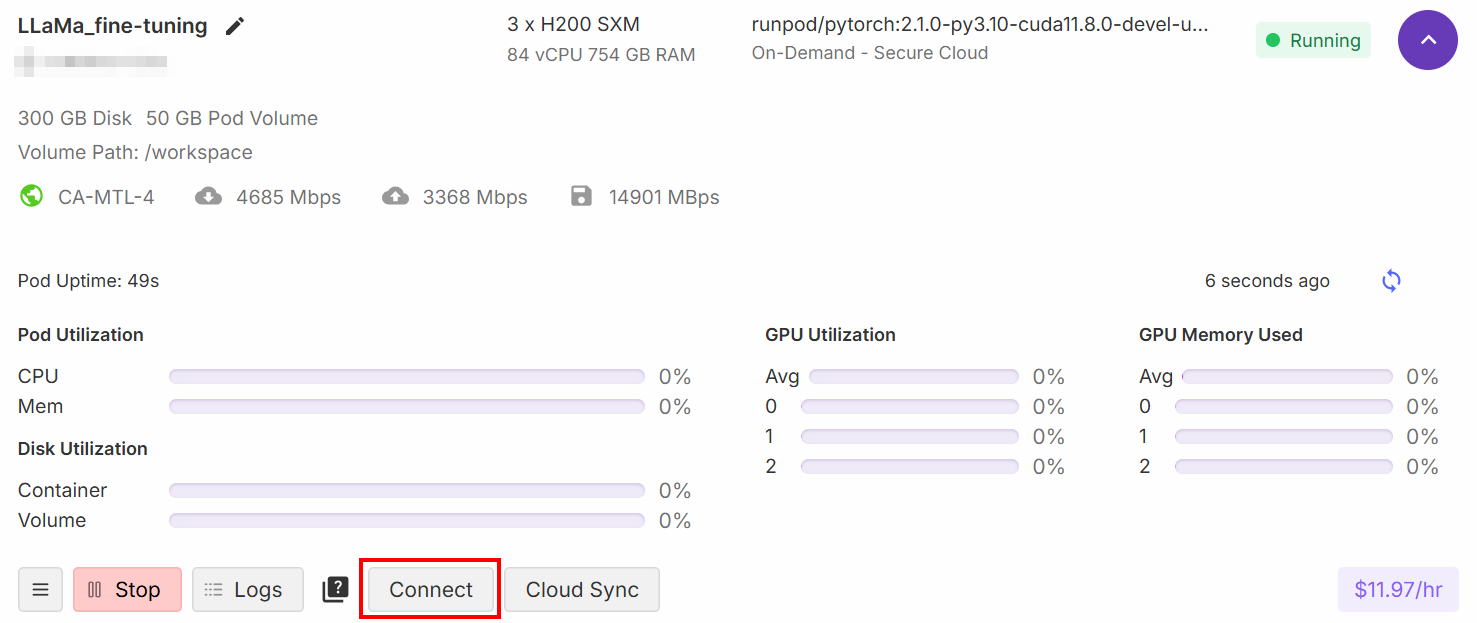
这样,您就可以将 Pod 连接到Jupiter Lab笔记本电脑:
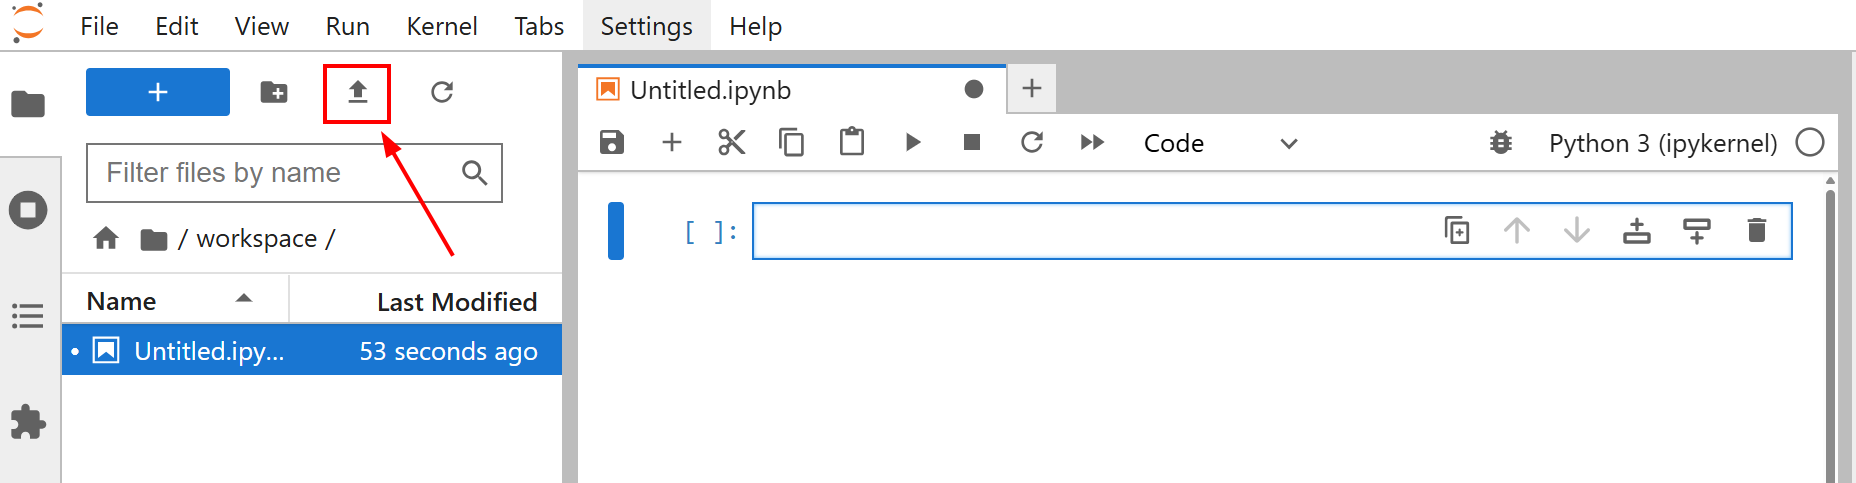
选择装有 “Python 3 (ipykernel) “卡的笔记本:

很好!您现在拥有了训练 Llama 4 模型的正确基础结构。
利用采集的数据微调 Llama 4
在开始微调模型之前,请将amazon-data.json文件上传到您的 Jupyter Lab 笔记本。为此,请单击 “上传文件 “按钮:
本教程的微调目标是使用amazon-data.json数据集训练 Llama 4。通过这种方式,您可以教会 Llama 4 如何根据一些特征(如对象名称和一些特征)为办公对象创建描述。
现在您可以开始训练模型了。请按照以下步骤使用新的网络数据对 Llama 4 进行微调!
步骤 #1:安装图书馆
在笔记本的第一个单元中,安装所需的库:
%%capture
!pip install transformers==4.51.0
%pip install -U datasets
%pip install -U accelerate
%pip install -U peft
%pip install -U trl
%pip install -U bitsandbytes
%pip install huggingface_hub[hf_xet]
这些图书馆是
变压器:提供数千个预训练模型。数据集:提供大量数据集和高效数据处理工具。加速:简化了在各种分布式配置中运行 PyTorch 训练脚本的过程,只需修改最少的代码。peft:只需更新一小部分参数,就能更高效地对大型预训练模型进行微调。trl:专为使用强化学习技术训练转换器语言模型而设计。scipy:用 Python 编写的科技计算库。huggingface_hub:提供了一个与拥抱脸枢纽(Hugging Face Hub)交互的 Python 接口。通过该接口,您可以下载和上传模型、数据集和 Spaces。bitsandbytes:提供易于使用的 8 位优化器和量化功能,减少了大型深度学习模型训练和推理的内存占用。
完美!您已经安装了微调过程所需的库。
步骤 #2:连接到拥抱脸
在笔记本的第二个单元格中写道
from huggingface_hub import notebook_login, login

# Interactive login
notebook_login()
print("Login cell executed. If successful, you can proceed.")
运行后,将显示以下内容:
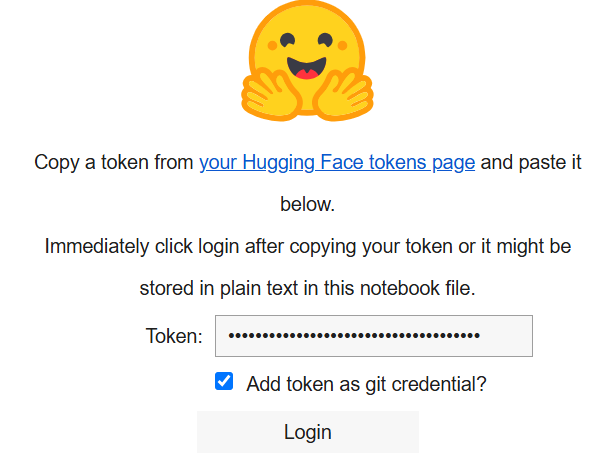
在 “令牌 “框中,粘贴您在 Hugging Face 帐户上创建的令牌。
太棒了您现在可以从 “拥抱的脸 “中找回 “拉玛 4 “模型了。
步骤 #3:加载 Llama 4 模型
在笔记本的第三个单元格中,写下以下代码:
import os
import torch
import json
from transformers import AutoTokenizer, AutoModelForCausalLM, pipeline, Llama4ForConditionalGeneration, BitsAndBytesConfig
from trl import SFTTrainer

# Load model
base_model_name = "meta-llama/Llama-4-Scout-17B-16E-Instruct"

# Configuration for BitsAndBytes quantization
bnb_config = BitsAndBytesConfig(
    load_in_4bit=True,
    bnb_4bit_use_double_quant=False,
    bnb_4bit_quant_type="nf4",
    bnb_4bit_compute_dtype=torch.bfloat16,
)

# Load the Llama4 model with specified configurations
model = Llama4ForConditionalGeneration.from_pre-trained(
    base_model_name,
    device_map="auto",
    torch_dtype=torch.bfloat16,
    quantization_config=bnb_config,
    trust_remote_code=True,
)

# Disable caching for the model
model.config.use_cache = False
# Set pre-training tensor parallelism to 1
model.config.pre-training_tp = 1

# Path to fine-tuning JSON data file.
fine_tuning_data_file_path = "amazon-data.json"

# Path to results
output_model_dir = "results_llama_office_items_finetuned/"
final_model_adapter_path = os.path.join(output_model_dir, "final_adapter")
max_seq_length_for_tokenization = 1024

# Create output directory
os.makedirs(output_model_dir)
上述片段:
- 定义使用
base_model_name加载的模型名称。 - 使用
BitsAndBytesConfig()方法用bnb_config配置模型的权重。 - 使用
from_pre-trained()方法加载模型,对其进行训练。 - 使用
fine_tuning_data_file_path加载微调数据集。 - 定义结果的输出目录路径,并使用
makedirs()方法创建该路径。
单元格运行结束后,你应该会看到这样的结果:

太棒了您的 Llama 4 模型已设置完毕并加载到笔记本中。
步骤 #4:为训练过程准备微调数据集
在笔记本的第四格编写以下代码,为训练过程准备微调数据集:
from datasets import Dataset

# Open fine-tuning dataset
with open(fine_tuning_data_file_path, "r") as f:
  data_list = json.load(f)

# Convert the list of data items into a Hugging Face Dataset object
raw_fine_tuning_dataset = Dataset.from_list(data_list)
print(f"Converted JSON data to Hugging Face Dataset. Num examples: {len(raw_fine_tuning_dataset)}")

def format_fine_tuning_entry(data_item):
    system_message = "You are an expert copywriter. Generate a concise and appealing product description based on the provided details."
    # ADJUST THE FOLLOWING LINES to your fine-tuning file
    item_title = data_item.get("title")
    item_brand = data_item.get("brand")
    item_category = data_item.get("categories")
    item_name = data_item.get("name")
    item_features_list = data_item.get("features")
    item_features_str = ", ".join(item_features_list) if isinstance(item_features_list, list) else str(item_features_list)
    target_description = data_item.get("description")

    # Training prompt
    user_prompt = (
        f"Generate a product description for the following item:n"
        f"Title: {item_title}nBrand: {item_brand}nCategory: {item_category}n"
        f"Name: {item_name}nFeatures: {item_features_str}nDescription:"
    )
    # Llama chat format
    formatted_string = (
        f"<|start_header_id|>system<|end_header_id|>nn{system_message}<|eot_id|>"
        f"<|start_header_id|>user<|end_header_id|>nn{user_prompt}<|eot_id|>"
        f"<|start_header_id|>assistant<|end_header_id|>nn{target_description}<|eot_id|>"
    )
    return {"text": formatted_string}

# Apply the formatting function to each entry in the raw dataset to structure it for fine-tuning
text_formatted_dataset = raw_fine_tuning_dataset.map(format_fine_tuning_entry)

# Tokenizer Setup
tokenizer = AutoTokenizer.from_pre-trained(base_model_name, trust_remote_code=True)
tokenizer.pad_token = tokenizer.eos_token

# Pre-tokenize the dataset
def tokenize_function_for_sft(examples):
    # Tokenize the "text" field which contains the full chat-formatted string
    tokenized_output = tokenizer(
        examples["text"],
        truncation=True,
        padding="max_length",
        max_length=max_seq_length_for_tokenization,
    )
    return tokenized_output

# Apply the tokenization function to the formatted dataset
tokenized_train_dataset = text_formatted_dataset.map(
    tokenize_function_for_sft,
    batched=True,
    remove_columns=["text"]
  )
笔记本的这一格:
- 打开微调数据集,并使用
Dataset.from_list()方法将其转换为拥抱脸数据集对象。 - 定义
format_fine_tuning_entry()函数。其目的是获取单个数据项(产品详细信息)并将其转换为结构化文本格式,以适用于微调聊天模型(如 Llama)的指令。请注意,这必须根据微调数据集的结构进行调整。 - 对数据集进行标记化,并通过
map()方法应用标记化。这样做是因为语言模型无法理解原始文本。它们是在称为标记的数字表示上运行的。
单元运行结束后,预期结果如下:

请注意,”Num examples(示例总数)”的值取决于您的微调数据集。
不可思议!您的微调数据集已为微调过程做好准备。
步骤 #5:为参数高效微调(PEFT)配置环境和参数
在笔记本的新单元格中,编写以下代码,为 PEFT 设置环境和参数:
from transformers import BitsAndBytesConfig
from peft import LoraConfig

# QLoRA configuration
bnb_config = BitsAndBytesConfig(
    load_in_4bit=True,
    bnb_4bit_quant_type="nf4",
    bnb_4bit_compute_dtype=torch.bfloat16,
    bnb_4bit_use_double_quant=True,
)

# LoRA configuration
lora_config = LoraConfig(
    r=16,
    lora_alpha=32,
    lora_dropout=0.05,
    bias="none",
    task_type="CAUSAL_LM",
    target_modules=["q_proj", "k_proj", "v_proj", "o_proj", "gate_proj", "up_proj", "down_proj"],
)
此代码
- 用
BitsAndBytesConfig()方法定义量化 QLoRA 配置,以指定加载预训练语言模型时的量化方式。量化是一种降低计算和内存成本的技术。 - 定义 LoRA 配置,以便使用LoraConfig() 方法对模型进行有效的参数微调。
非常好!环境已经准备好进行有效的微调。
步骤 #6:启动培训流程
在一个新单元格中,编写以下代码来初始化训练过程:
from peft import get_peft_model, prepare_model_for_kbit_training
from transformers import TrainingArguments

# Prepare model for k-bit training
model = prepare_model_for_kbit_training(
    model,
    gradient_checkpointing_kwargs={"use_reentrant": False}
)
# Apply the PEFT (LoRA) configuration to the model.
model = get_peft_model(model, lora_config)
# Disable caching in the model's configuration.
model.config.use_cache = False
# Print the number of trainable parameters in the model.
model.print_trainable_parameters()

# Define Training Arguments
training_args = TrainingArguments(
    output_dir=output_model_dir,
    num_train_epochs=3,
    per_device_train_batch_size=1,
    gradient_accumulation_steps=4,
    learning_rate=2e-4,
    logging_steps=25,
    save_steps=50,
    fp16=True,
    optim="paged_adamw_8bit",
    lr_scheduler_type="cosine",
    warmup_ratio=0.03,
    report_to="none",
    max_grad_norm=0.3,
    save_total_limit=2,
)

# Initialize SFTTrainer
trainer = SFTTrainer(
    model=model,
    args=training_args,
    train_dataset=tokenized_train_dataset,
    peft_config=lora_config,
)
该单元格中的代码:
prepare_model_for_kbit_training()方法会将预加载的模型进行量化训练。get_peft_model()方法获取量化和准备好的基础模型,并应用lora_config。- 通过调用
TrainingArguments()类来定义训练参数。 - 使用
SFTTrainer()初始化训练器。
以下是预期结果:

步骤 #7:训练模型
最后,该流程已准备就绪,可以使用train()方法训练 Llama 4 模型:
# Train the model
trainer.train()

# Save Fine-tuned Model
trainer.save_model(final_model_adapter_path) # Saves the LoRA adapter
tokenizer.save_pre-trained(final_model_adapter_path) # Save tokenizer with the adapter
结果如下
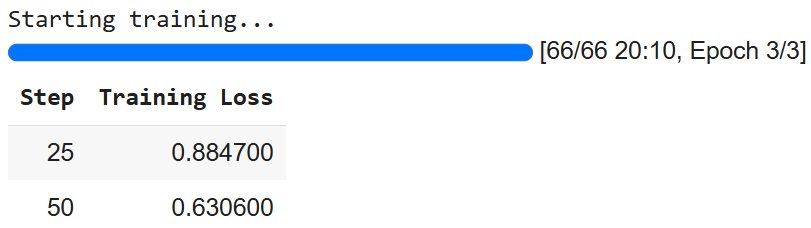
请注意,由于人工智能的随机性,您可能会得到不同的数字。
步骤 #8:为推理准备模型
要准备推理模型,请在新单元格中编写以下代码:
# Load the model with quantization for inference
base_model_for_inference = AutoModelForCausalLM.from_pre-trained(
  base_model_name,
  quantization_config=bnb_config,
  device_map="auto",
  trust_remote_code=True
)
# Load the fine-tuned LoRA adapter and attach it to the model
fine_tuned_model_for_testing = PeftModel.from_pre-trained(
    base_model_for_inference,
    final_model_adapter_path
)

# Merge LoRA adapter into the base model
fine_tuned_model_for_testing = fine_tuned_model_for_testing.merge_and_unload()

# Load the tokenizer
fine_tuned_tokenizer_for_testing = AutoTokenizer.from_pre-trained(
    final_model_adapter_path,
    trust_remote_code=True
)
# Configure the tokenizer for inference
fine_tuned_tokenizer_for_testing.pad_token = fine_tuned_tokenizer_for_testing.eos_token
fine_tuned_tokenizer_for_testing.padding_side = "left"
# Set the fine-tuned model to evaluation mode
fine_tuned_model_for_testing.eval()
该单元格中的代码:
- 使用
from_pre-trained()方法加载模型,以便对其进行推理。 - 加载、应用和合并 LoRA 适配器到基础模型,以进行推理。
- 加载经过微调的标记符,并为推理进行配置。
- 使用
eval()方法将模型设置为评估模式。这将禁用特定的训练行为,确保推理过程中输出一致且确定的结果。
我们开始吧!一切都为推理做好了准备。
步骤 #9:推断模型
最后一步,您将进行推理。在此之前,您已经在亚马逊抓取的商品上训练了 Llama 4。现在,给定了一些数据,其中包括类似办公用品的名称和特征,您想看看模型是否能够生成其描述。
以下代码允许您管理推理过程:
# Define a list of synthetic product data items for testing the fine-tuned model
synthetic_test_items = [
  {
    "title": "Executive Ergonomic Office Chair", "brand": "ComfortLuxe", "category": "Office Chairs", "name": "ErgoPro-EL100",
    "features": ["High-back design", "Adjustable lumbar support", "Breathable mesh fabric", "Synchronized tilt mechanism", "Padded armrests", "Heavy-duty nylon base"]
  },
  {
    "title": "Adjustable Standing Desk Converter", "brand": "FlexiDesk", "category": "Desks & Workstations", "name": "HeightRise-FD20",
    "features": ["Spacious dual-tier surface", "Smooth gas spring lift", "Adjustable height range 6-17 inches", "Supports up to 35 lbs", "Keyboard tray included", "Non-slip rubber feet"]
  },
  {
    "title": "Wireless Keyboard and Mouse Combo", "brand": "TechGear", "category": "Computer Peripherals", "name": "SilentType-KM850",
    "features": ["Full-size keyboard with numeric keypad", "Quiet-click keys", "Ergonomic mouse with adjustable DPI", "2.4GHz wireless connectivity", "Long battery life", "Plug-and-play USB receiver"]
  },
  {
    "title": "Desktop Organizer with Drawers", "brand": "NeatOffice", "category": "Desk Accessories", "name": "SpaceSaver-DO3",
    "features": ["Multi-compartment design", "Two pull-out drawers", "Durable wooden construction", "Compact footprint", "Ideal for pens, notes, and small supplies"]
  },
  {
    "title": "LED Desk Lamp with USB Charging Port", "brand": "BrightSpark", "category": "Office Lighting", "name": "LumiCharge-LS50",
    "features": ["Adjustable brightness levels (5)", "Color temperature modes (3)", "Flexible gooseneck design", "Built-in USB charging port", "Eye-caring, flicker-free light", "Energy-efficient LED"]
  },
]

# System message and prompt structure for inference
system_message_inference = "You are an expert copywriter. Generate a concise and appealing product description based on the provided details."

print("n--- Generating Descriptions with Fine-Tuned Model using Synthetic Test Data ---")

# Iterate through each item in the synthetic_test_items list
for item_data in synthetic_test_items:
    # Construct the user prompt part based on the synthetic item's structure
    user_prompt_inference = (
        f"Generate a product description for the following office item:n"
        f"Title: {item_data["title"]}n"
        f"Brand: {item_data["brand"]}n"
        f"Category: {item_data["category"]}n"
        f"Name: {item_data["name"]}n"
        f"Features: {", ".join(item_data["features"])}n"
        f"Description:" # The model will generate text after this.
    )

    full_prompt_for_inference = (
        f"<|start_header_id|>system<|end_header_id|>nn{system_message_inference}<|eot_id|>"
        f"<|start_header_id|>user<|end_header_id|>nn{user_prompt_inference}<|eot_id|>"
        f"<|start_header_id|>assistant<|end_header_id|>nn"
    )

    print(f"nPROMPT for item: {item_data["name"]}")

    # Tokenize the full prompt string using the fine-tuned tokenizer.
    inputs = fine_tuned_tokenizer_for_testing(
        full_prompt_for_inference,
        return_tensors="pt",
        padding=False,
        truncation=True,
        max_length=max_seq_length_for_tokenization - 150
    ).to(fine_tuned_model_for_testing.device)

    # Perform inference
    with torch.no_grad():
        outputs = fine_tuned_model_for_testing.generate(
            **inputs,
            max_new_tokens=150,
            num_return_sequences=1,
            do_sample=True,
            temperature=0.6,
            top_k=50,
            top_p=0.9,
            pad_token_id=fine_tuned_tokenizer_for_testing.eos_token_id,
            eos_token_id=[
                fine_tuned_tokenizer_for_testing.eos_token_id,
                fine_tuned_tokenizer_for_testing.convert_tokens_to_ids("<|eot_id|>")
            ]
        )

    # Decode the generated token IDs back into a human-readable text string
    generated_text_full = fine_tuned_tokenizer_for_testing.decode(outputs[0], skip_special_tokens=False)
    # Define the marker that indicates the beginning of the assistant's response in the Llama chat format.
    assistant_marker = "<|start_header_id|>assistant<|end_header_id|>nn"
    # Find the last occurrence of the assistant marker in the generated text
    assistant_response_start_index = generated_text_full.rfind(assistant_marker)

    # Extract the actual generated description from the full model output
    if assistant_response_start_index != -1:
        # If the assistant marker is found, extract the text that comes after it
        generated_description = generated_text_full[assistant_response_start_index + len(assistant_marker):]
        # Define the end-of-turn token for Llama
        eot_token = "<|eot_id|>"
        # Check if the extracted description ends with the Llama end-of-turn token and remove it.
        if generated_description.endswith(eot_token):
            generated_description = generated_description[:-len(eot_token)]
        # Also check if it ends with the tokenizer's standard end-of-sequence token and remove it.
        if generated_description.endswith(fine_tuned_tokenizer_for_testing.eos_token):
             generated_description = generated_description[:-len(fine_tuned_tokenizer_for_testing.eos_token)]
        # Remove any leading or trailing whitespace from the cleaned description
        generated_description = generated_description.strip()
    else:
        # Fallback: If the assistant marker is not found, try to extract the generated part by assuming it's everything after the original input prompt.
        input_prompt_decoded_len = len(fine_tuned_tokenizer_for_testing.decode(inputs["input_ids"][0], skip_special_tokens=False))
        # Decode the input prompt tokens to get its length as a string.
        generated_description = generated_text_full[input_prompt_decoded_len:].strip()
        # Clean up any trailing Llama end-of-turn token from this fallback extraction.
        if generated_description.endswith("<|eot_id|>"):
            generated_description = generated_description[:-len("<|eot_id|>")]
        generated_description = generated_description.strip()

    # Print the extracted and cleaned generated description
    print(f"GENERATED (Fine-tuned):n{generated_description}")
    # Print a separator line for better readability between items.
    print("-" * 50)
最后一个 Jupyter Notebook 单元管理推理过程。在微调过程中,该过程有助于了解训练效果如何。
特别是上述代码:
- 将测试数据定义为一个名为
synthetic_test_items 的列表。该列表中的每个元素都是一个字典,代表一个产品,包含标题、品牌、类别、名称等详细信息和一系列特征。这些数据将作为模型的输入,其结构必须与微调数据集的结构相匹配。 - 用
system_message_inference设置 rnference 提示结构。这必须与训练过程中使用的提示相匹配。 synthetic_test_items循环中的 for item_data会为每个item_data创建一个用户提示。每个item_data的结构必须与训练过程中使用的结构一致。- 标记并控制模型如何生成输出文本。实际推理是在
with语句下进行的。尤其要感谢作为核心推理步骤的generate()方法。 - 使用标记化器将模型的原始输出(即标记 ID 序列)解码为人类可读的字符串
(generated_text_full)。 - 使用
if-else块清理语言模型的原始输出,只提取助手生成的产品描述。原始输出(generated_text_full)通常包括整个输入提示和模型的回复,所有格式都使用 Llama 的特殊聊天标记。 - 打印结果。
结果如下
--- Generating Descriptions with Fine-Tuned Model using Synthetic Test Data ---

PROMPT for item: ErgoPro-EL100
GENERATED (Fine-tuned):
**Introducing the ErgoPro-EL100: The Ultimate Executive Ergonomic Office Chair**

Experience the pinnacle of comfort and support with the ComfortLuxe ErgoPro-EL100, designed to elevate your work experience. This premium office chair boasts a high-back design that cradles your upper body, providing unparalleled lumbar support and promoting a healthy posture.

The breathable mesh fabric ensures a cool and comfortable seating experience, while the synchronized tilt mechanism allows for seamless adjustments to your preferred working position. The padded armrests provide additional support and comfort, reducing strain on your shoulders and wrists.

Built to last, the ErgoPro-EL100 features a heavy-duty nylon base that ensures stability and durability. Whether you're working long hours or simply
--------------------------------------------------

PROMPT for item: HeightRise-FD20
GENERATED (Fine-tuned):
**Elevate Your Productivity with FlexiDesk's HeightRise-FD20 Adjustable Standing Desk Converter**

Take your work to new heights with FlexiDesk's HeightRise-FD20, the ultimate adjustable standing desk converter. Designed to revolutionize your workspace, this innovative converter transforms any desk into a comfortable and ergonomic standing station.

**Experience the Benefits of Standing**

The HeightRise-FD20 features a spacious dual-tier surface, perfect for holding your laptop, monitor, and other essential work tools. The smooth gas spring lift allows for effortless height adjustments, ranging from 6 to 17 inches, ensuring a comfortable standing position that suits your needs.

**Durable and Reliable**

With a sturdy construction and non-slip rubber feet
--------------------------------------------------
就是这样!您使用 Bright Data Scraper API 获取的全新数据集对 Llama 4 进行了微调。
结论
在本文中,您将学习如何使用 Bright Data Scraper API 从亚马逊获取的数据集对 Llama 4 进行微调。您已经经历了以下所有过程:
- 从网上检索数据。
- 用令牌建立拥抱脸账户。
- 建立必要的云计算基础设施。
- 训练和测试(推理) Llama 4.
微调过程的核心依赖于高质量的数据集。幸运的是,Bright Data 为您提供了大量用于数据集获取或创建的人工智能就绪服务:
- 抓取浏览器:与 Playwright、Selenium 和 Puppeter 兼容的浏览器,内置解锁功能。
- Web Scraper API:预配置 API,用于从 100 多个主要域中提取结构化数据。
- 网络解锁程序:一体化应用程序接口,可在具有反僵尸保护功能的网站上处理网站解锁。
- SERP API:专门的 API,可解锁搜索引擎结果并提取完整的 SERP 数据。
- 基础模型:访问符合要求的网络规模数据集,以便进行预训练、评估和微调。
- 数据提供商:与值得信赖的提供商建立联系,大规模获取高质量的人工智能就绪数据集。
- 数据包:获取经过整理、随时可用的数据集–结构化、丰富和注释。
免费创建 Bright Data 账户,测试我们的人工智能就绪数据基础设施!


技术写作者
 3 years experience
Federico Trotta 是一名技术写作者、编辑和数据科学家。擅长技术内容管理、数据分析、机器学习和 Python 开发。