中,什么是监督微调.svg)
在本指南中,您将了解到如何监督微调 LLM:
- 什么是 LLM 中的监督微调?
- 这种做法的目标是什么
- 实施所需的资源
- 有监督微调 LLM 的工作流程
- 实施 SFT 的技术挑战和考虑因素
- 在 LLM 上复制监督微调的分步教程
让我们深入了解一下!
定义 LLM 背景下的监督微调 (SFT)
监督微调(SFT)是一种应用于 LLM 的迁移学习形式。迁移学习是一种机器学习方法,您可以应用从解决一个问题中获得的知识来帮助解决一个不同但相关的问题。
在 LLMS 中,有监督的微调包括将预先训练好的模型进一步训练。具体做法是,使用与特定任务相关的标注示例数据集,调整模型参数。
监督 “是整个过程的关键,因为工程师是整个过程的幕后推手:
- 他们用明确的输入输出对准备微调数据集。该数据集包含 “正确答案”,可引导模型针对特定提示进行学习。
- 他们策划了从设置到监控和验证的整个微调过程。
具体来说,与 RAG(检索-增强生成)相比,微调修改的是模型本身。而 RAG 则对模型不做任何改动,只是向其输入新的相关信息。而微调则涉及一个新的训练过程。
LLM 中监督微调的目标是什么?
有监督微调的主要目标是提高 LLM 在特定任务上的性能,使其超出预先训练的一般能力。这包括
- 任务专业化:让模型精通文本摘要、特定语言代码生成、情感分析等任务。
- 领域适应:在模型中加入特定领域的知识和术语。常见的例子有法律文件分析、医疗报告生成和财务预测。
- 语调统一:对模型进行培训,以采用一致的品牌语音、正式程度或聊天机器人等应用所需的特定对话角色。
实施微调需要什么
说到这里,您可能会问:为什么不从一开始就培养法律硕士呢?原因很简单。培养一名法律硕士需要:
- 海量数据通常存储在多个数据中心。
- 很多硬件。
- 投入大量资金和时间。
举例来说,要训练 ChatGPT、Gemini 等类似模型,就需要
- 几个月,甚至几年。
- 大量 GPU–每个都价值数千美元–分布在多个数据中心。
要进行微调,您只需要三样东西:
- 预训练模型
- 一台电脑
- 小型标注数据集。
现在应该更清楚为什么微调如此方便了吧。
监督微调工作流程背后的机制
执行监督微调过程涉及多个技术步骤。是时候对整个过程进行分解了!
步骤 #1:整理高质量的 SFT 数据集
这一过程的有效性在很大程度上取决于微调数据集的质量和相关性。这包括
- 数据来源:使用多种数据源技术之一,获取与目标任务相关的原始数据。数据量从数百行到数万行不等。这取决于任务的复杂性和预训练模型。
- 数据结构化:将原始数据转换为适合 SFT 流程的结构化格式。其中一种典型格式是JSON 行 (JSONL),每一行都是一个 JSON 对象,包含输入和所需输出的不同字段。
- 质量保证:确保数据准确、一致、多样,不存在可能对模型行为产生负面影响的偏差。
步骤 #2:选择合适的预训练模型
有多种预训练模型可供选择。选择最适合您的情况的主要考虑因素包括:
- 模型规模:以模型参数数量来衡量,如 7B、13B、70B 等,规模越大,通常意味着模型能够学习更复杂的模式和细微差别,但也需要更多的硬件资源来进行微调。
- 模型架构:不同架构可能更适合执行特定任务。例如:
- 仅解码器结构(GPT 系列、Llama、Mistral、PaLM): 擅长生成类任务,即在已给定内容的基础上延续输出,包括文本生成、摘要、指令跟随以及对话系统等,因其本质是预测序列中下一个 Token。
- 编码器-解码器结构(T5、BART、Flan-T5): 拥有独立的编码器和解码器组件,擅长需要“输入序列到输出序列”转换类型的任务,例如机器翻译、文本摘要以及问答等。
- 基础能力:在决定进行微调前,可先测试预训练模型在与目标任务相关的学术基准上的表现,以获得基线并评估模型潜能。例如:
- 诸如 GPT-4、Claude 3 Opus 或 Gemini Advanced 等模型通常具备更复杂的推理能力。
- 开源模型(如 Llama 3 系列)在多种基准上表现出色,在推理、编程以及常识任务上可与专有模型媲美。
- 针对代码预训练的模型(CodeLlama 或 WizardCoder)在代码生成任务上表现更为优异。
- 授权许可:模型的发布许可决定了其可使用、修改与分发的方式。有些模型自由度更高,也有些则严格限制。
- 现有微调成果:当已有相似任务的微调模型时,先在此基础上进行二次微调往往比从零开始对基座模型进行微调更高效,这可以视作一种中间微调方案。
步骤 #3:实施培训循环
这一过程的核心是反复检查标注数据集,并调整模型的权重:
- 前向传递:模型处理来自 SFT 数据集的输入(提示)并生成输出。
- 损失计算:损失函数将模型生成的逐个令牌输出与数据集中提供的目标输出进行比较。这有助于量化误差。
- 反向传递(反向传播):计算出的损失用于计算梯度,表明每个模型权重对误差的影响程度。
- 权重更新:优化算法使用梯度和指定的学习率来调整模型的权重。其目标是使后续迭代的误差最小。
- 超参数调整:对控制训练过程的参数进行调整,以提高模型的性能。
步骤 #4:评估结果
最后一步是评估微调模型的性能。这包括
- 验证集:必须使用标注数据集的一部分来监控进度,防止过度拟合。
- 测试集:你需要一个包含模型未见过的新数据的数据集,它可以是微调数据集的一个子集。微调完成后,执行此步骤进行最终评估。
- 衡量标准:定义与任务相关的量化指标,以评估性能。
- 定性分析:审查模型输出,以评估一致性、相关性、风格一致性和安全性。
实施 SFT 的技术挑战和考虑因素
实施 SFT 会面临一些技术挑战,例如
- 数据集的质量和规模:最大的挑战在于创建或获取足够大、高质量和有代表性的标注数据集。数据质量差直接导致模型性能差。数据提取、清理、标记、聚合和格式化需要大量的工作和领域专业知识。
- 减少灾难性遗忘:对特定任务进行密集微调可能会导致模型 “遗忘 “预训练时学到的一些通用能力。使用较低的学习率、减少微调次数或采用多样化数据等策略有助于缓解这一现象。
- 超参数优化策略:寻找最优超参数集是一个经验过程。这需要进行多次实验并仔细监测验证指标。自动超参数调整框架可以提供帮助,但会增加复杂性。
监督微调 LLM:逐步教程
是时候将理论付诸实践了。本教程将指导您对轻量级 LLM 进行微调,使您无需额外硬件即可使用计算机。我们的目标是微调 LLM,以便在给定一系列特征的情况下生成电子商务产品描述。
您将使用DistilGPT2作为 LLM,它是 GPT-2 的蒸馏版本,体积更小,效率更高。
让我们对所选模型进行微调!
先决条件
要复制本教程,对 LLM 进行监督微调,您的计算机必须至少安装Python 3.10 以上版本。
您还需要一个 CSV 数据集来进行微调。在这里,我们将使用一个包含电子商务产品数据的自定义数据集。数据集包含每个产品的以下字段:
- 类别:电子产品、书籍、厨房和类似产品。
- 名称:产品名称。
- 特点:产品的主要特点。
- 颜色:产品的颜色。
- 描述:描述产品或产品功能的文字。
下面的图片展示了所使用的数据样本:

步骤 1:开始
假设将项目的主文件夹称为fine_tuning/。在这一步结束时,文件夹的结构如下:
fine_tuning/
    ├── data/
    |   └── data.csv
    ├── results_distilgpt2/
    ├── tuning.py
    └── venv/
在哪里?
data.csv包含用于微调 LLM 的标注数据。results_distilgpts/是包含结果的文件夹。它将在进程中自动创建。tuning.py是包含所有逻辑的 Python 文件。venv/包含虚拟环境。
您可以像这样创建venv/ 虚拟环境目录:
python -m venv venv要激活它,在 Windows 上运行
venvScriptsactivate同样,在 macOS/Linux 上执行
source venv/bin/activate在激活的虚拟环境中,安装本教程所需的库:
pip install transformers datasets torch trl 本项目使用的图书馆有
transformers:Hugging Face 的最先进机器学习模型库。数据集:Hugging Face 数据库用于访问和处理数据集。火炬PyTorch 是一个开源机器学习框架。trl:Hugging Face 的 Transformer 强化学习库,其中包括用于 SFT 的工具,如SFTTrainer。
完美!用于 LLM 微调的 Python 环境已正确设置。
步骤 #2:初始设置、数据加载和文本格式设置
第一步,您必须在tuning.py 中设置整个流程:
import os
from datasets import load_dataset
from transformers import AutoTokenizer, AutoModelForCausalLM, TrainingArguments, pipeline
from trl import SFTTrainer

# Configure parameters
base_model_name = "distilgpt2"  # Pre-trained model to be fine-tuned
data_file_path = "data/data.csv" # Path to your CSV data file
output_model_dir = "./results_distilgpt2"  # Directory to save training results and checkpoints
final_model_path = os.path.join(output_model_dir, "final_model") # Path to save the final fine-tuned model
max_seq_length_for_tokenization = 512 # Maximum sequence length for tokenizing inputs

# Load dataset
raw_dataset = load_dataset("csv", data_files=data_file_path)

# Define a function to format entries into a prompt-completion pair
def format_dataset_entry(data_item):
    prompt_template = "Generate a product description for the following item:nFeatures: {features_data}nnDescription:"
    data_item["text"] = prompt_template.format(features_data=data_item["features"]) + " " + data_item["description"]
    return data_item

# Apply the formatting function to the train split of the dataset
text_formatted_dataset = raw_dataset["train"].map(format_dataset_entry)
这个片段
- 定义与
base_model_name一起使用的 LLM 名称。 - 定义 CSV 文件的路径,并使用
load_dataset()方法打开该文件。 - 创建一个用于存储结果的文件夹
(results_distilgpt2/)。 - 创建
format_dataset_entry()函数,将原始数据集中的每一行转换为文本格式,以便进行微调。它还会将修改后的内容附加到 CSV 中的 “描述 “列,覆盖当前的描述。这将为模型提供经过清理的文本描述。 - 使用
map()方法将format_dataset_entry()函数应用于训练分割数据集中的每个项目。
干得好您已经完成了流程的初始设置。
步骤 #3:标记数据集
语言模型无法理解原始文本。它们是在称为标记的数字表示上运行的。这一步包括加载预训练的标记符,并用它将格式化的文本条目转换为标记 ID 序列:
# Load the tokenizer associated with the base model
tokenizer = AutoTokenizer.from_pretrained(base_model_name)
tokenizer.pad_token = tokenizer.eos_token # Padding token

# Define a function to tokenize the "text" field of the dataset
def tokenize_function(data_items_batch):
    return tokenizer(
        data_items_batch["text"],
        truncation=True,
        padding="max_length",
        max_length=max_seq_length_for_tokenization,
    )

# Apply the tokenization function to the formatted dataset
tokenized_dataset = text_formatted_dataset.map(
    tokenize_function,
    batched=True,
    remove_columns=text_formatted_dataset.column_names
)
上述代码的作用如下
- 使用
AutoTokenizer.from_pretrained()方法加载与base_model_name关联的标记符。 - 定义填充标记,使所有输入序列在输入模型时长度相同。
- 使用自定义函数
tokenize_function()对数据集进行标记化,并将标记化应用于数据集。
精彩!数据集已标记化。
步骤 #4:配置并运行微调程序
数据集已准备就绪并标记化,现在可以进入微调任务的核心部分:
# Load the pre-trained language model
model = AutoModelForCausalLM.from_pretrained(base_model_name)

# Define training arguments for the SFTTrainer
training_args = TrainingArguments(
    output_dir=output_model_dir,
    num_train_epochs=3,
    per_device_train_batch_size=1,
    learning_rate=2e-5,
    logging_steps=10,
    save_steps=50,
    report_to="none",
)

# Initialize the SFTTrainer
trainer = SFTTrainer(
    model=model,
    args=training_args,
    train_dataset=tokenized_dataset,
)

# Begin the training process
trainer.train()

# Save the fine-tuned model and tokenizer to the specified path
trainer.save_model(final_model_path)
tokenizer.save_pretrained(final_model_path)
此代码
- 使用
AutoModelForCausalLM.from_pretrained()方法加载基本模型。 - 使用
TrainingArguments()方法定义进程的设置,如历元数、批量大小和学习率。 - 初始化并运行
SFTTrainer(),为模型提供标记化数据集和训练参数。这将管理实际的微调循环。 - 训练模型并将结果保存在专用文件夹中。
太棒了您已经开始了微调过程。
步骤 #5:评估和测试微调模型
现在,您必须对其性能进行评估,看看该模型为新的、未见过的产品功能生成描述的效果如何:
# Load the fine-tuned model and tokenizer for testing
fine_tuned_model_for_testing = AutoModelForCausalLM.from_pretrained(final_model_path)
fine_tuned_tokenizer_for_testing = AutoTokenizer.from_pretrained(final_model_path)

# Create a text-generation pipeline with the fine-tuned model
generator_fine_tuned = pipeline("text-generation", model=fine_tuned_model_for_testing, tokenizer=fine_tuned_tokenizer_for_testing)

# Define example product features for testing
test_product_features = [
    "Category: Kitchen, Name: Electric Kettle, Features: 1.7L capacity, Stainless steel, Auto shut-off, Boil-dry protection, Color: Silver",
    "Category: Office, Name: Ergonomic Office Chair, Features: Lumbar support, Adjustable height, Mesh back, Swivel, Color: Black"
]

# Define the prompt template
prompt_template_inference = "Generate a product description for the following item:nFeatures: {features}nnDescription:"

# Generate descriptions for each test item
for features_item in test_product_features:
    full_prompt = prompt_template_inference.format(features=features_item)
    print(f"nPROMPT:n{full_prompt}")

    generated_outputs = generator_fine_tuned(
        full_prompt,
        max_new_tokens=70,
        num_return_sequences=1,
        pad_token_id=fine_tuned_tokenizer_for_testing.eos_token_id,
        eos_token_id=fine_tuned_tokenizer_for_testing.eos_token_id
    )
    print(f"GENERATED (Fine-tuned):n{generated_outputs[0]['generated_text']}")
该代码段的功能如下
- 加载微调模型和标记符。
- 使用
pipeline()方法使用微调模型创建文本生成流水线。 - 定义一个列表,提供新的、未见过的产品描述,以便通过
test_product_features对模型的微调进行反馈和评估。 - 为
for循环中的每个测试项目生成说明。 - 打印微调模型生成的描述。
酷!您已经建立了测试和评估模型性能的管道。
第 6 步:将所有内容整合在一起
现在,您的tuning.py文件中应该包含
import os
from datasets import load_dataset
from transformers import AutoTokenizer, AutoModelForCausalLM, TrainingArguments, pipeline
from trl import SFTTrainer

# Configure parameters
base_model_name = "distilgpt2"  # Pre-trained model
data_file_path = "data/data.csv" # Path to data
output_model_dir = "./results_distilgpt2"  # Directory to save results and checkpoints
final_model_path = os.path.join(output_model_dir, "final_model") # Path to save the final fine-tuned model
max_seq_length_for_tokenization = 512 # Maximum length for tokenizing inputs

# Load dataset
raw_dataset = load_dataset("csv", data_files=data_file_path)

# Define a function to format entries into a prompt-completion pair
def format_dataset_entry(data_item):
    prompt_template = "Generate a product description for the following item:nFeatures: {features_data}nnDescription:"
    data_item["text"] = prompt_template.format(features_data=data_item["features"]) + " " + data_item["description"]
    return data_item

# Apply the formatting function to the train split of the dataset
text_formatted_dataset = raw_dataset["train"].map(format_dataset_entry)

# Load the tokenizer associated with the base model
tokenizer = AutoTokenizer.from_pretrained(base_model_name)
tokenizer.pad_token = tokenizer.eos_token

# Define a function to tokenize the "text" field of the dataset
def tokenize_function(data_items_batch):
    return tokenizer(
        data_items_batch["text"],
        truncation=True,
        padding="max_length",
        max_length=max_seq_length_for_tokenization,
    )

# Apply the tokenization function to the formatted dataset
tokenized_dataset = text_formatted_dataset.map(
    tokenize_function,
    batched=True,
    remove_columns=text_formatted_dataset.column_names
)

# Load the pre-trained language model
model = AutoModelForCausalLM.from_pretrained(base_model_name)

# Define training arguments for the SFTTrainer
training_args = TrainingArguments(
    output_dir=output_model_dir,
    num_train_epochs=3,
    per_device_train_batch_size=1,
    learning_rate=2e-5,
    logging_steps=10,
    save_steps=50,
    report_to="none",
)

# Initialize the SFTTrainer
trainer = SFTTrainer(
    model=model,
    args=training_args,
    train_dataset=tokenized_dataset,
)

# Begin the training process
trainer.train()

# Save the fine-tuned model and tokenizer to the specified path
trainer.save_model(final_model_path)
tokenizer.save_pretrained(final_model_path)

# Load the fine-tuned model and tokenizer for testing
fine_tuned_model_for_testing = AutoModelForCausalLM.from_pretrained(final_model_path)
fine_tuned_tokenizer_for_testing = AutoTokenizer.from_pretrained(final_model_path)

# Create a text-generation pipeline with the fine-tuned model
generator_fine_tuned = pipeline("text-generation", model=fine_tuned_model_for_testing, tokenizer=fine_tuned_tokenizer_for_testing)

# Define example product features for testing
test_product_features = [
    "Category: Kitchen, Name: Electric Kettle, Features: 1.7L capacity, Stainless steel, Auto shut-off, Boil-dry protection, Color: Silver",
    "Category: Office, Name: Ergonomic Office Chair, Features: Lumbar support, Adjustable height, Mesh back, Swivel, Color: Black"
]

# Define the prompt template
prompt_template_inference = "Generate a product description for the following item:nFeatures: {features}nnDescription:"

# Generate descriptions for each test item
for features_item in test_product_features:
    full_prompt = prompt_template_inference.format(features=features_item)
    print(f"nPROMPT:n{full_prompt}")

    generated_outputs = generator_fine_tuned(
        full_prompt,
        max_new_tokens=70,
        num_return_sequences=1,
        pad_token_id=fine_tuned_tokenizer_for_testing.eos_token_id,
        eos_token_id=fine_tuned_tokenizer_for_testing.eos_token_id
    )
    print(f"GENERATED (Fine-tuned):n{generated_outputs[0]['generated_text']}")
使用
python tuning.py预期结果是这样的

如图所示,提示要求模型创建对电热水壶的描述,并提供所需的信息。模型按照预期创建了描述。如果对结果进行细分,可以看到
- 生成产品名称:它会生成 “ProChef Luxury Living Hood Series X”(ProChef 豪华生活油烟机 X 系列)这一听起来很像厨房用品的产品名称和描述。
- 自相矛盾的细节:最后一句话是 “提供令人惊叹的纯白色外观”,这与提示功能中提供的 “颜色:银色 “相矛盾。因此,虽然微调可以引导模型,但并不能保证完全一致。这种情况在模型较小和培训有限的情况下尤其容易发生。
不完善和矛盾是生成模型的典型特征,尤其是像distilgpt2 这样的小型模型。它们还取决于微调数据集的大小和质量,以及训练历元的数量。在本例中,使用的数据集只有 300 行。如果数据集更大,对水壶的描述会更好。
为了说明质量的损失,下面是只有 5 行的 CSV 的预期结果:

如你所见,结果完全是幻觉。分解一下
- 生成产品名称:****It 在第一个短语中将产品命名为 “办公椅”,而不是 “人体工学办公椅”。
- 矛盾的细节:**** 在第二个短语中,名称变成了 “腰部”。因此,模型混淆了名称和功能(”腰部支撑”)。
- 语法不一致:两个短语的语法都不一致且错误。
- 功能缺失:说明中没有提及颜色和功能(”腰部支撑”、”可调节高度”、”旋转”)。
但是,如果不进行微调,而是向distilgpt2模型提供同样的提示,输出结果就会大打折扣。出现这种情况的原因是,这个模型并不是根据如此具体的数据训练出来的。例如,它无法提供水壶的描述。
请注意,程序完成后,代码会自动生成一个名为results_distilgpt2/ 的文件夹。 该文件夹将报告结果。在这个文件夹中,你可以找到报告模型在不同时间段所保存结果的子文件夹:
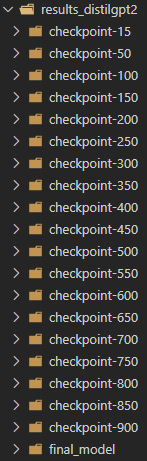
如果您想获得其中任何一个检查点,并随意使用它们,这将非常有用。
就是这样!法律硕士微调完成。
结论
在本文中,您了解了什么是 LLM 背景下的监督微调。您还经历了一步步复制微调过程的过程。
核心 SFT 依赖于高质量的数据集来微调模型。幸运的是,Bright Data 为您提供了大量数据集获取或创建服务:
- 抓取浏览器:与 Playwright、Selenium 和 Puppeter 兼容的浏览器,内置解锁功能。
- 网络抓取 API:预配置 API,用于从 100 多个主要域中提取结构化数据。
- 网络解锁程序:一体化应用程序接口,可在具有反僵尸保护功能的网站上处理网站解锁。
- SERP API:专门的 API,可解锁搜索引擎结果并提取完整的 SERP 数据。
- 基础模型:访问符合要求的网络规模数据集,以便进行预训练、评估和微调。
- 数据提供商:与值得信赖的提供商建立联系,大规模地获取高质量的人工智能就绪数据集。
- 数据包:获取经过整理、随时可用的数据集–结构化、丰富和注释。
免费创建一个 Bright Data 帐户,测试我们的数据提取服务并探索我们的数据集市场!


技术写作者
 3 years experience
Federico Trotta 是一名技术写作者、编辑和数据科学家。擅长技术内容管理、数据分析、机器学习和 Python 开发。